Introduction to Microgreens
Overview
Starting out with microgreens can feel like information overload. This extensive article is designed to give you a clear, streamlined introduction to the key steps in producing organic microgreens from seed to sale. Whether you’re growing at home or scaling up to commercial production, the fundamentals covered here will set you on the right track.
What Are Microgreens?
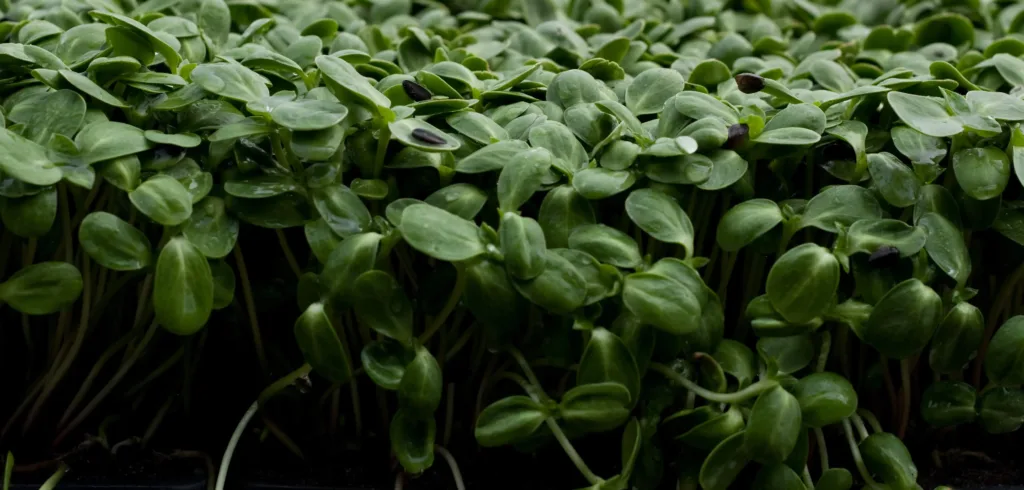
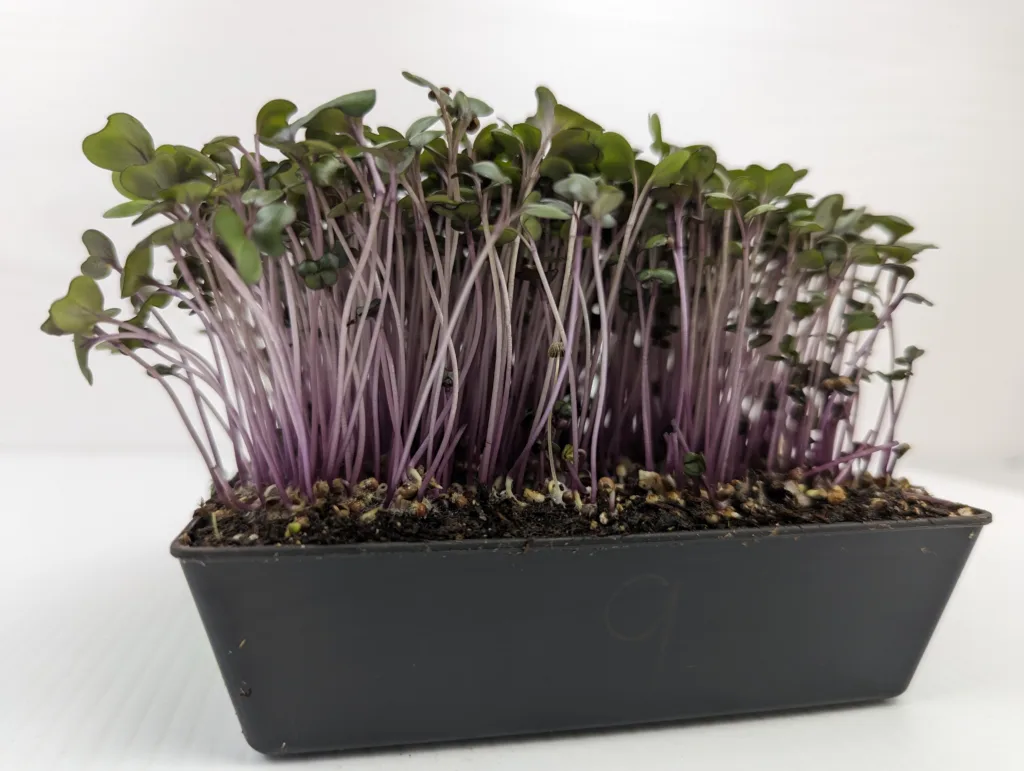
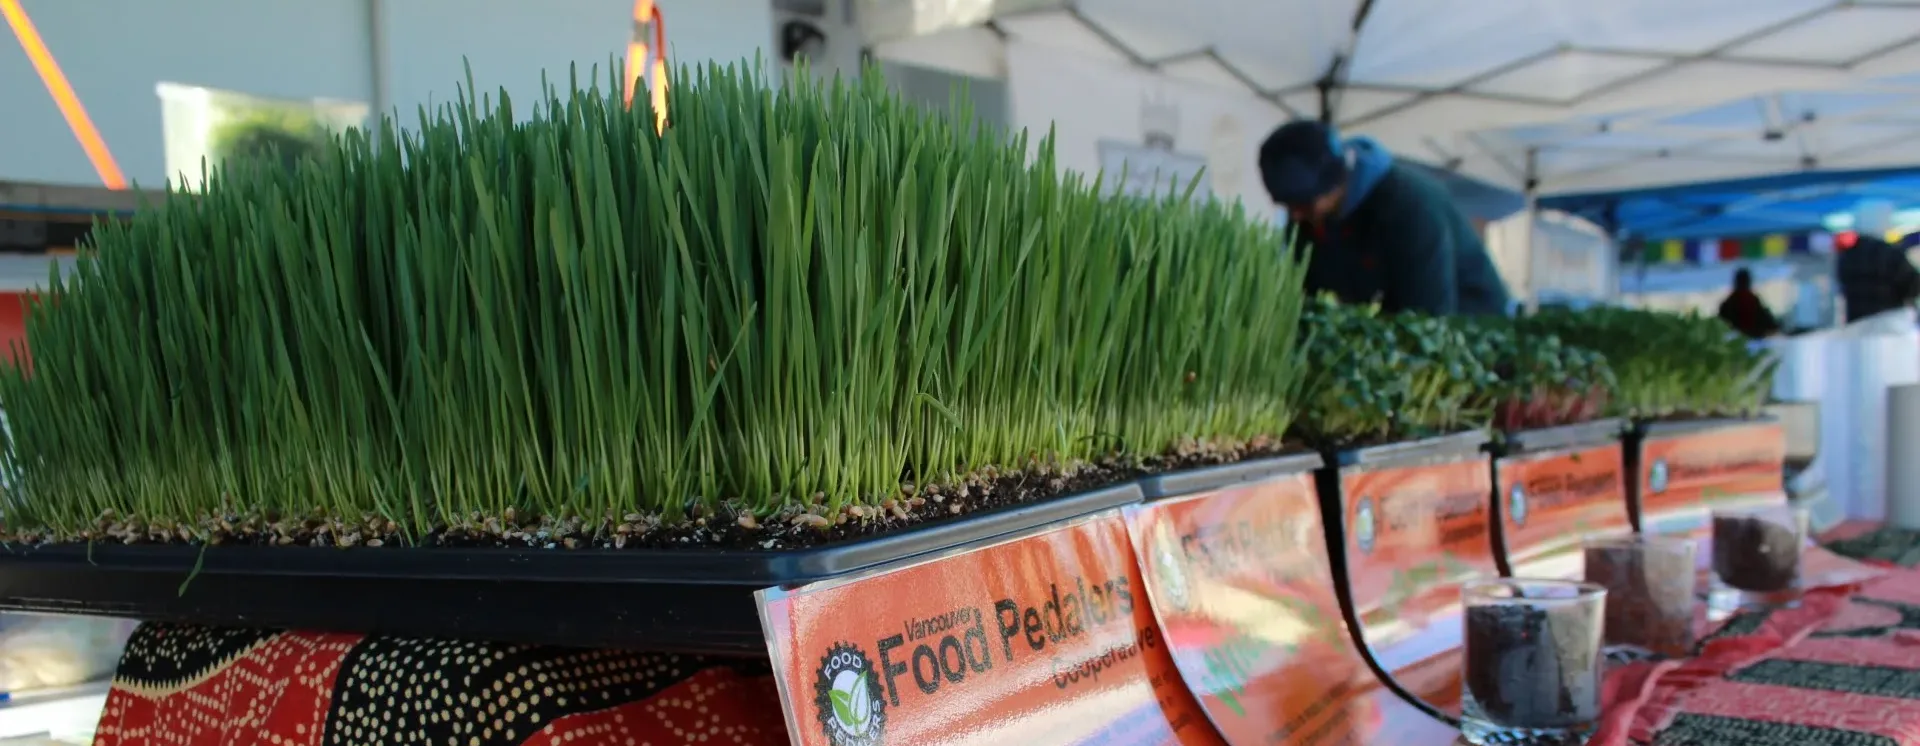
Microgreens are the tender young shoots of vegetables, herbs, flowers, and grains, harvested in their early stages of development. Most varieties are ready for harvest in 7 to 12 days, though some may take up to 30 days. At harvest, they typically range from 5 to 15 cm (2 to 6 inches) in height.
Why Microgreens Are in Demand
These tiny greens pack a punch—in flavor, appearance, and nutrition. Consumers love their vibrant colors and nutrient density. For growers, they offer high crop turnover, great margins, and the flexibility to grow in small spaces – making them ideal for home-based businesses or urban farms.
How Microgreens Are Grown
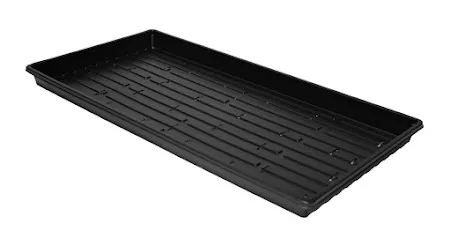
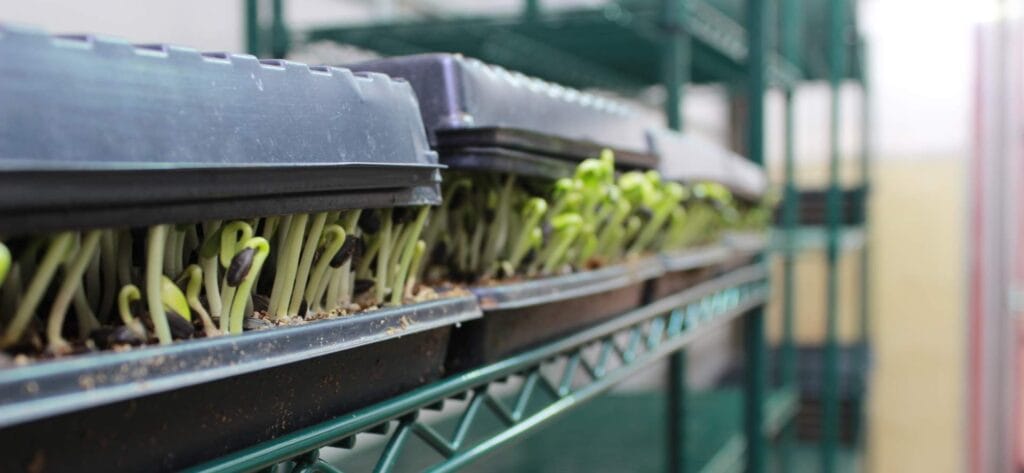
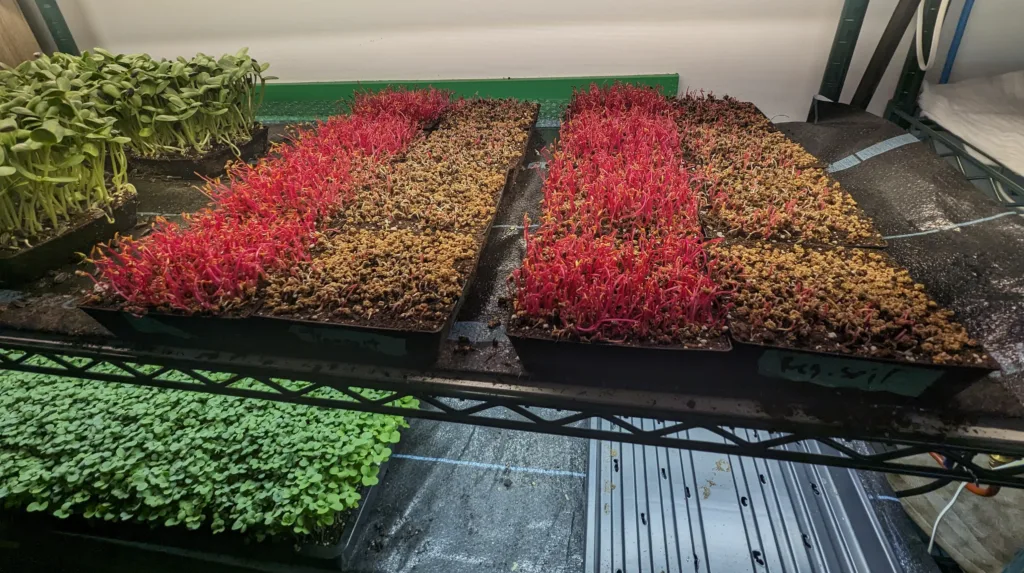
While methods can vary, most microgreens are cultivated in shallow trays—typically 10″x20″ plastic trays — (“ten-twenty” trays) with a soil mix based on peat or coir. They’re commonly grown on shelves, under lights indoors or in greenhouses using natural light. The growth cycle includes a germination period (3–7 days), followed by a light exposure phase leading up to harvest.
Trays and Growing Containers
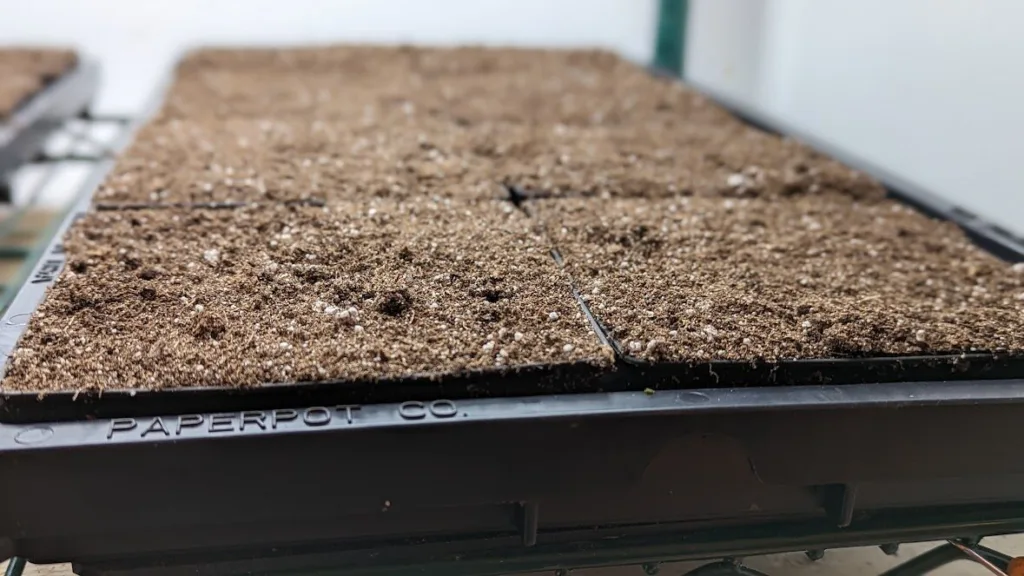
Standard 1020 trays are widely used, but some growers opt for larger, heavy-duty alternatives like Paperpot trays. For watering, growers often pair perforated trays with solid-bottom trays to allow for bottom watering, helping avoid foliage diseases caused by wet leaves and soil surfaces.
Growing Media
Soil remains the preferred growing medium for most microgreens operations. It supports not just physical growth, but also water retention, nutrient availability, and beneficial microbial activity. A common mix includes:
- 70% peat moss or coir
- 25% perlite or vermiculite
- 5% compost
Look for OMRI-listed mixes for organic systems or collaborate with local soil suppliers for custom blends.
Soil plays multiple roles in microgreen production:
- Rooting medium – for the crop to anchor itself.
- Water retention – holding water and releasing it for plant use.
- Pore space – for root respiration.
- Crop nutrition – to support crop growth and health.
- Biological activity – helping support disease suppression and crop health.
Understanding the different roles soil plays in microgreens crop production can help you effectively troubleshoot soil contributions to crop issues.
There are different soil mixes available commercially, which vary by region. A good place to start is with a standard potting mix such as Pro-Mix or Sunshine Mix (not an endorsement), which come in a variety of options. Several mixes are OMRI approved for organic production systems in the United States.
Microgreens Seeds
Your seed quality directly impacts your crop quality. Source seed from trusted suppliers specializing in microgreens and certified free of pathogens. Even with clean seed, sanitizing before use—especially with organic-approved sanitizers like hydrogen peroxide or peracetic acid—adds an extra layer of safety.
Proper seed storage also matters: keep them in a cool, dry, pest-free place, ideally where the sum of temperature and humidity is below 100 (e.g., 40°F + 40% RH = ideal). Store your seeds off the ground to avoid water damage due to flooding.
Shelving and Growing Setups
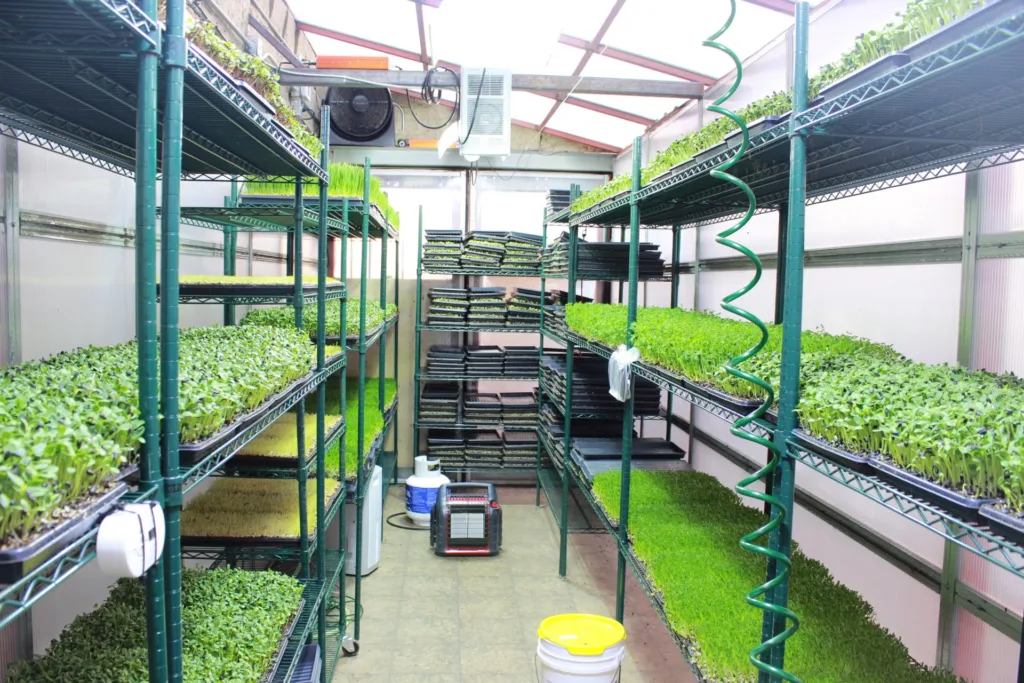
Restaurant-style adjustable metal shelving works well in indoor systems. Choose rust-resistant materials like stainless steel or epoxy-coated units.
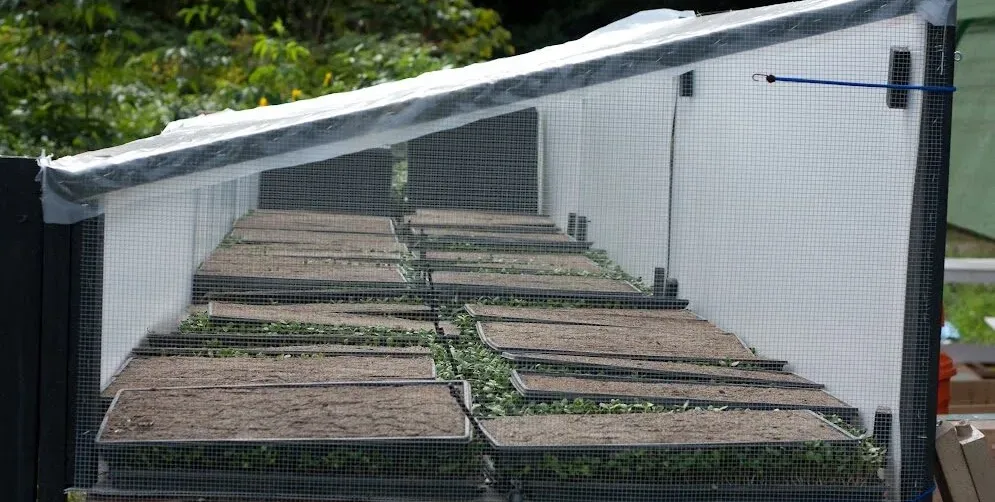
For outdoor systems, consider compact tabletop greenhouses or larger seasonal greenhouses with climate control using heaters and shade cloth.
If you want to grow your microgreens outside, you can do so in a traditional greenhouse or in a “reach-in” or table-top greenhouse, which can be built on a low budget. In both cases, growth may be seasonal. In the reach-in greenhouse, you can use a small heater in the shoulder season to keep things warm enough for growth. In the heat of summer you can use shade cloth to keep the temperature more manageable.
Creating the Ideal Microgreens Environment
Several environmental factors affect your microgreens success:
- Temperature: Most crops thrive between 72–79°F (22–26°C).
- Humidity: Aim for 50–60% RH to avoid disease.
- Air Flow: Use fans to prevent stagnant air and dry the canopy.
- Air Exchange: Bring in fresh air to maintain CO₂ levels.
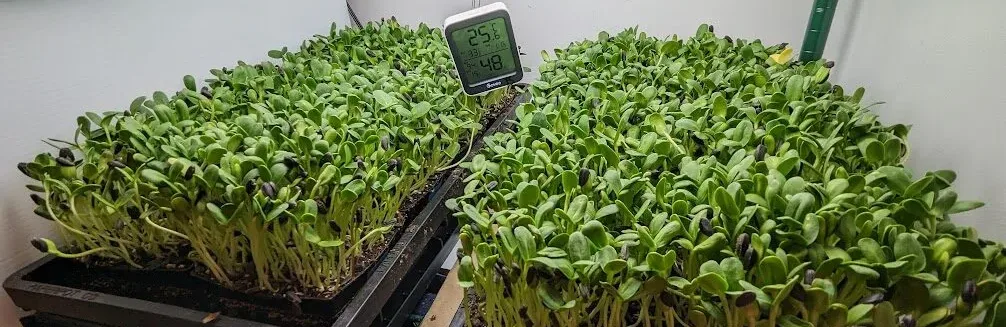
For best results, track your climate conditions using data loggers and adjust your system based on real-time insights.
Temperature Management
Microgreens are remarkably adaptable when it comes to temperature, but each crop has its sweet spot. While some varieties thrive in warm conditions—like sunflower and corn shoots—others, such as wheatgrass and cilantro, prefer cooler climates. A good baseline temperature for most microgreens is room temperature or slightly warmer.

A recommended starting range is 72°F to 79°F (22°C to 26°C). From there, you can fine-tune based on the specific needs of your crops and your growing environment.
Factors That Influence Temperature
Your system’s temperature is shaped by multiple variables. Being aware of how each one functions helps you create a more stable and productive growing environment.
- Ambient Conditions
The outdoor climate will inevitably impact your indoor grow space. Seasonal temperature swings can change how much you need to heat or cool your system. - Direct Sunlight
Sun exposure in greenhouses plays a major role in heat levels. Indoors, even window light can significantly raise local temperatures, especially on hot days. - Heating Equipment
For colder conditions, heaters are a must. Options include electric and gas-powered models, available in a range of sizes to fit nearly any grow room or greenhouse setup. - Lighting Systems
Grow lights do more than illuminate—they also emit heat. This can be beneficial in cooler environments, but potentially problematic if your system already runs warm. Lights placed close to the crop will contribute more heat. - Air Conditioning
In hotter climates, or during peak summer months, air conditioning may be necessary. It’s particularly important for crops that are sensitive to high temperatures. - Dehumidifiers
While their primary role is to reduce humidity, dehumidifiers also produce heat. This can be useful or detrimental, depending on your space and goals. - Insulation
Consistent temperatures rely on good insulation. Properly insulated walls, ceilings, and even tray systems can make a big difference in how much you need to actively heat or cool.
Why Temperature Control Matters
Even though most microgreens can handle a broad range of temperatures, extremes on either end—too hot or too cold—can reduce yield, compromise flavor, or even lead to crop failure. Uniform, stable temperatures help ensure reliable growth and consistent product quality.
Tips for Managing Temperature Effectively
- Track Your Data
Use a data logger to record temperature patterns. Having reliable data helps you make informed decisions and detect trends before they affect your crops. - Prioritize Passive Methods
The more you can regulate temperature passively, the less energy (and money) you’ll spend. Try:- Adding insulation to reduce heat loss or gain.
- Using shade cloth to block excessive sunlight.
- Positioning greenhouses near natural shade to soften peak temperatures.
- Drawing in cooler outdoor air when appropriate.
- Upgrade Your Thermostat
A high-quality thermostat offers finer control over heating and cooling systems, allowing you to maintain more precise day/night settings. - Supplement With Cooling
If passive solutions aren’t enough, an air conditioner may be necessary—especially in summer or in sealed indoor spaces with high light output.
In short, temperature management is about balance and responsiveness. By understanding how various system elements interact with temperature—and using the right tools to monitor and manage them—you’ll be better equipped to grow healthy, high-quality microgreens all year round.
Managing Humidity in Your Microgreens System
In microgreens production, when we talk about humidity, we’re referring to relative humidity (RH)—the percentage of moisture in the air compared to the maximum it could hold at a given temperature. As the temperature rises, the air can hold more moisture, which means that warmer air naturally lowers the relative humidity—unless additional moisture enters the environment.
However, warmer temperatures also tend to accelerate plant growth, which in turn increases evapotranspiration (the release of water from plants into the air), potentially raising humidity again. This is why it’s important to monitor both temperature and humidity together—changes in one can directly affect the other.
Humidity management is crucial because excess moisture in the air can lead to crop disease, especially with dense crop plantings. Most growers aim for a relative humidity range between 50% and 60%. You can go lower, but be aware that crops will require more frequent watering in drier conditions.
Dehumidifiers are commonly used to manage RH, but they consume a lot of energy. To keep operating costs down, aim for the highest humidity your crops can tolerate without increasing the risk of disease. Tracking this threshold in your system is a key step toward a more energy-efficient operation.
The Role of Air Flow
Air circulation isn’t just about comfort—it plays three major roles in a healthy growing environment:
- Disease prevention
Stagnant air encourages the buildup of moisture around your crops, which increases the likelihood of fungal or bacterial issues. - Temperature consistency
Moving air helps maintain a more even climate throughout your grow space—both side to side and top to bottom. - A dry crop canopy
Dry foliage is easier to harvest and less prone to disease. Good airflow keeps the crop surface from staying damp after watering or condensation events.
A few well-placed oscillating fans are usually enough to maintain good airflow. It’s best to think of your fans as working together to move air in a cohesive loop, not as isolated blowers. Avoid placing fans randomly or creating turbulent air currents that stir up dust or stress your crops.
Some growers mount small fans on every shelf, but this is typically unnecessary (and expensive). Certain crops, like radish—which holds more water in its leaves—can benefit from direct airflow from an overhead fan, but for most crops, ambient circulation is sufficient.
Bringing in Fresh Air: The Importance of Air Exchange
While moving air within your system is important, it’s equally essential to bring in fresh air from outside. This can be done passively (by opening vents or doors) or actively using ventilation fans.
Air exchange is especially important for regulating temperature and maintaining adequate CO₂ levels. Plants absorb carbon dioxide during the day for photosynthesis, and in sealed or poorly ventilated systems, CO₂ can become depleted. This can slow down growth and reduce yields.
Photosynthesis only occurs during daylight hours, so air exchange is most important during the day. A well-designed exchange system brings in cooler, CO₂-rich air while helping to exhaust warm, humid air.
Why You Should Be Logging Your Data
Consistent data collection is one of the most underutilized tools in microgreens production. A data logger that tracks temperature and humidity over time gives you a clear picture of what’s happening in your system—day and night, week after week.
Logging this data helps you:
- Track the effectiveness of insulation, ventilation, and equipment upgrades
- Identify trends in your grow space
- Pinpoint causes of crop stress or disease
- Fine-tune climate control equipment
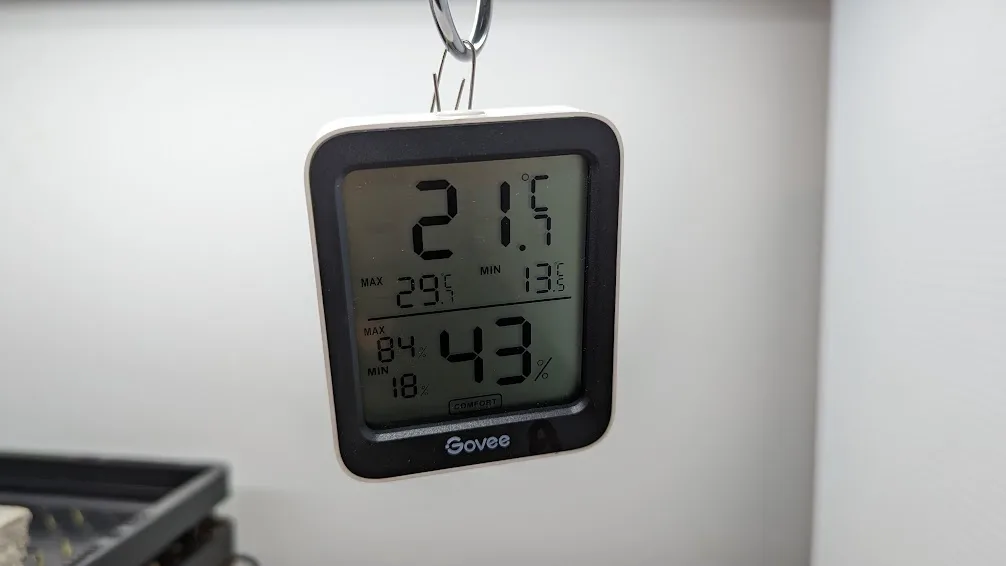
There are many data loggers available on the market, ranging from basic USB models to fully networked systems. Take the time to find one that fits your space and your data needs.
Understanding the Microgreens Growth Cycle
The life of a microgreens crop follows a clear sequence:

The crop cycle represents a seed’s transition from seed to crop to product. Let’s take a look at each of the crop production stages in detail.
Tray Preparation
Microgreens production begins with properly prepared trays of soil. You can prep trays right before sowing, or prepare them in advance to distribute the workload across the week. This can be especially helpful in larger operations where task management is key to maintaining efficiency.
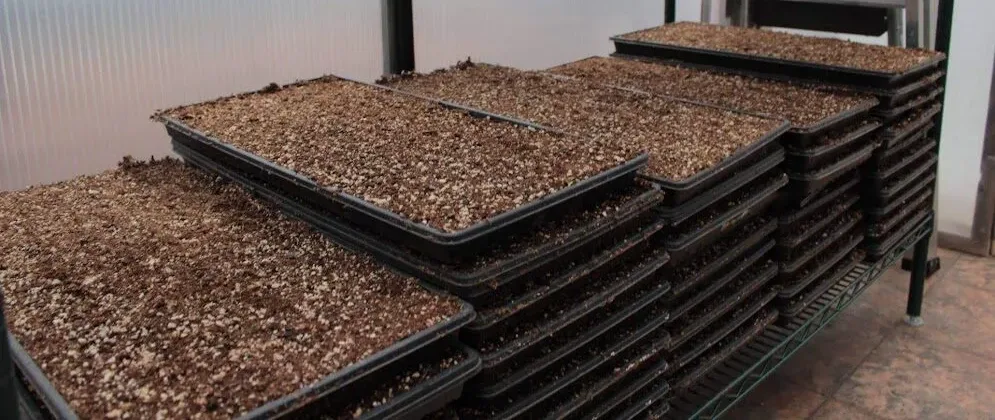
For best results, use one-inch deep trays and fill them all the way to the top. This gives your crops maximum rooting depth and improves the soil’s water-holding capacity—both of which support strong, even growth.
Moisten your soil slightly before filling trays. This helps minimize airborne soil particles and encourages the medium to settle evenly within the tray. Avoid using overly dry mixes, which can create dust and leave gaps in the tray.
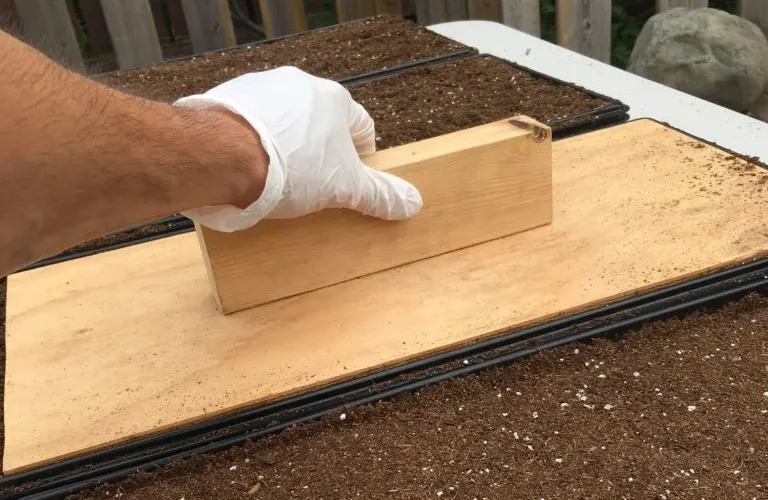
Once filled, level the soil surface to promote uniform germination. Some growers use a tamping board or a second tray to press down and smooth out the soil, creating a flat and even surface for seeding. This final step can make a big difference in ensuring consistent germination across the entire tray.
Soaking Seeds Before Sowing
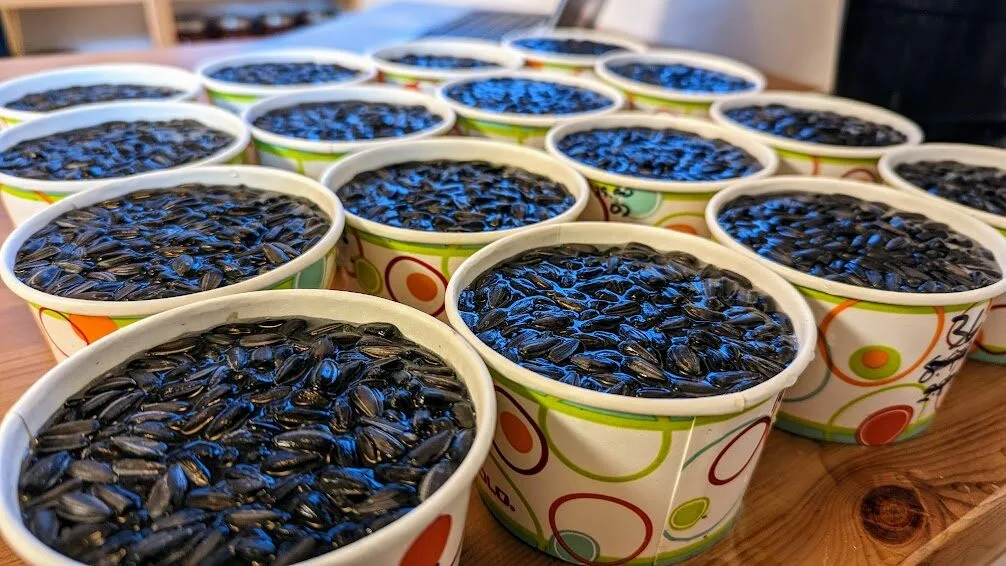
Larger seeds like pea, sunflower, corn, and wheatgrass often benefit from soaking before sowing.
Soaking initiates the germination process and helps ensure even, vigorous sprouting. These seeds are typically soaked for 1 to 12 hours, depending on the crop.
For commercial growers, this step often includes seed sanitization, which helps reduce the risk of introducing human pathogens into your growing system. Sanitizing seeds prior to soaking is an essential food safety step—especially when producing crops intended for raw consumption.
Growers may soak seeds in bulk batches or individually for each tray. Either approach can work, but you’ll need to choose container sizes that allow for seed expansion—some seeds, like peas, can swell to nearly three times their dry size during soaking.
Soaking Considerations for Small Seeds
Small-seeded crops such as arugula, broccoli, and amaranth do not require soaking. These seeds germinate quickly on moist soil and can become difficult to handle or prone to clumping if pre-soaked.
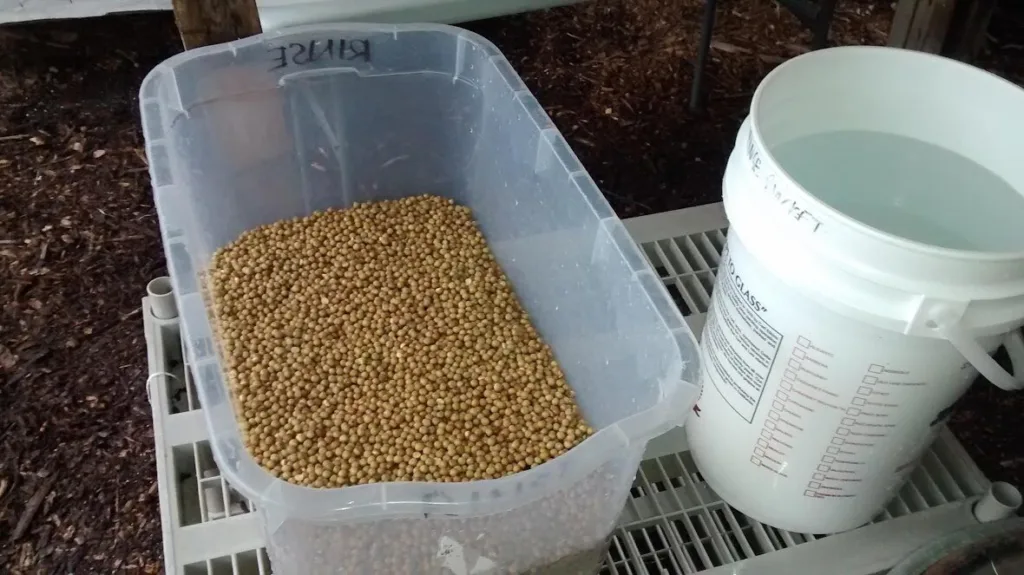
A Special Note on Sunflower Seeds
Sunflower seeds are notorious for floating. If soaked in a tall, narrow container, the top layer may stay above the water line, leaving some seeds inadequately soaked. Instead, use a wide, shallow bowl where seeds can spread out and remain fully submerged. This ensures even water absorption and more consistent germination.

Sowing Seeds: Starting the Growing Process
Sowing marks the official start of the crop cycle. The technique you use depends largely on seed size and whether the seeds were soaked beforehand.
Common Sowing Methods
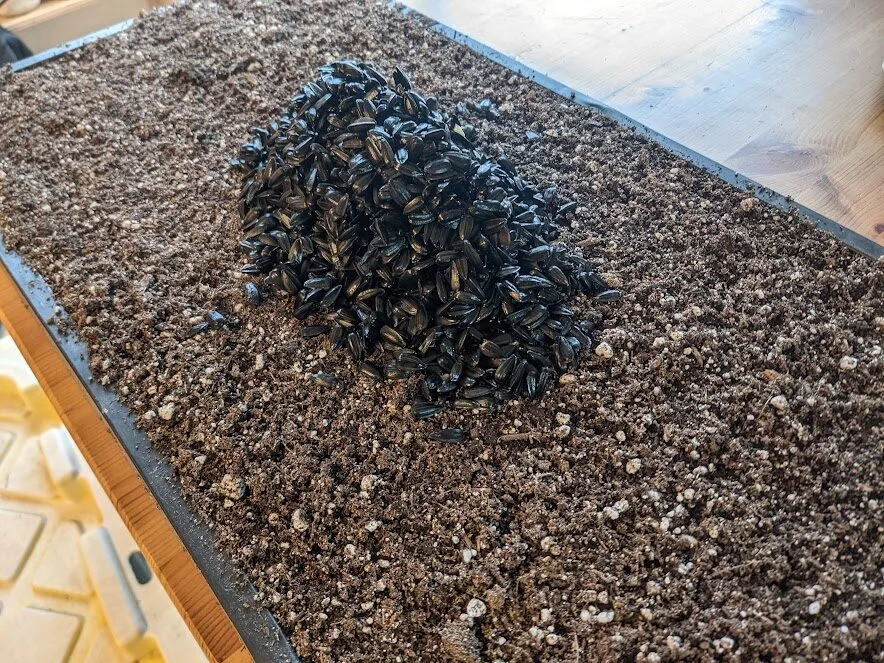
Dump-and-Spread
This method is best for large, soaked seeds like peas and sunflowers. Simply measure out the correct amount of seed, dump it into the center of the tray, and spread it evenly by hand.
It may feel awkward at first, but with practice, most growers develop a consistent and efficient technique.
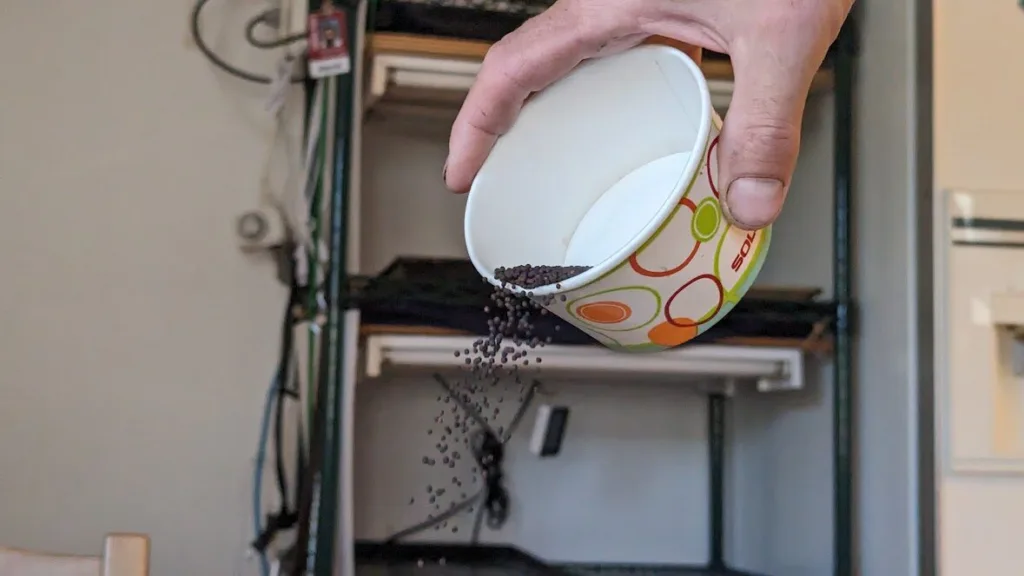
Sprinkle Method
Used for small, unsoaked seeds like arugula or broccoli, this method involves gently sprinkling seed over the surface of the soil. You can use a small cup, a long-handled sieve, or any container that gives you control over seed distribution. Different tools work better for different seeds, so experiment to find what works best for you.
Once seeded, give the tray a final watering. This post-sowing water is usually the last the crop receives until the germination stage is complete, so it’s important to ensure the soil is thoroughly—but not excessively—moist. Overwatering can saturate the soil and lead to fungal or bacterial issues.
Drop Seeder
A drop seeder like the Kwik Klik can significantly speed up sowing for small-seeded crops such as brassicas and mustards. The tool uses interchangeable seed plates with holes sized for different crops. Fill the plate, align it over the tray, and press the handle to distribute seed across the entire surface in one motion. Note: Drop seeders generally work best for seeds the size of cilantro or smaller.

Preparing the Soil Before Sowing
Before sowing your seed, make sure your soil is at the right moisture level. The goal is for seeds to make solid contact with moist—not wet—soil. Proper contact ensures that seeds can absorb enough water to germinate fully and root into the soil.
Saturated soil is problematic because it eliminates pore space for air, leading to anaerobic conditions that promote disease. If the soil feels spongy or waterlogged, it’s too wet.
A helpful trick is to learn by feel. Lift the tray before watering, and again after watering, to develop a sense of the right soil weight. A well-watered tray should feel heavy, but not as heavy as one that is fully saturated.
It takes a bit of trial and error—but once you get a feel for it, it becomes second nature.
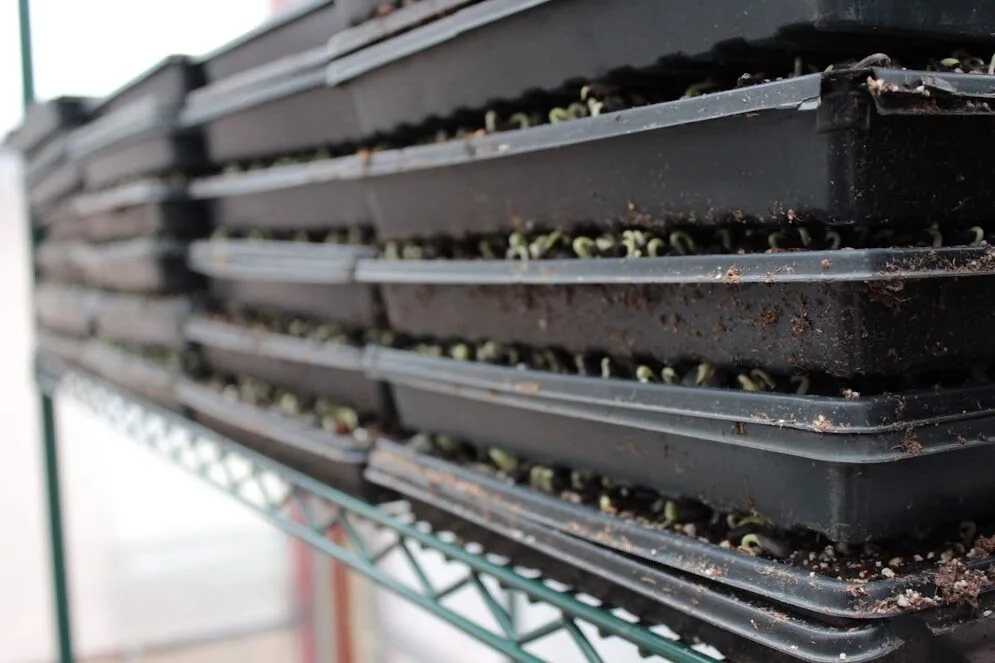
Germination and Stacking: Supporting a Strong Start
After sowing, microgreens enter the germination stage—a critical period where seeds begin transitioning into seedlings. During this phase, seeds emerge from their hulls and root into the soil. Depending on the crop and environmental conditions, germination typically lasts 2 to 6 days.
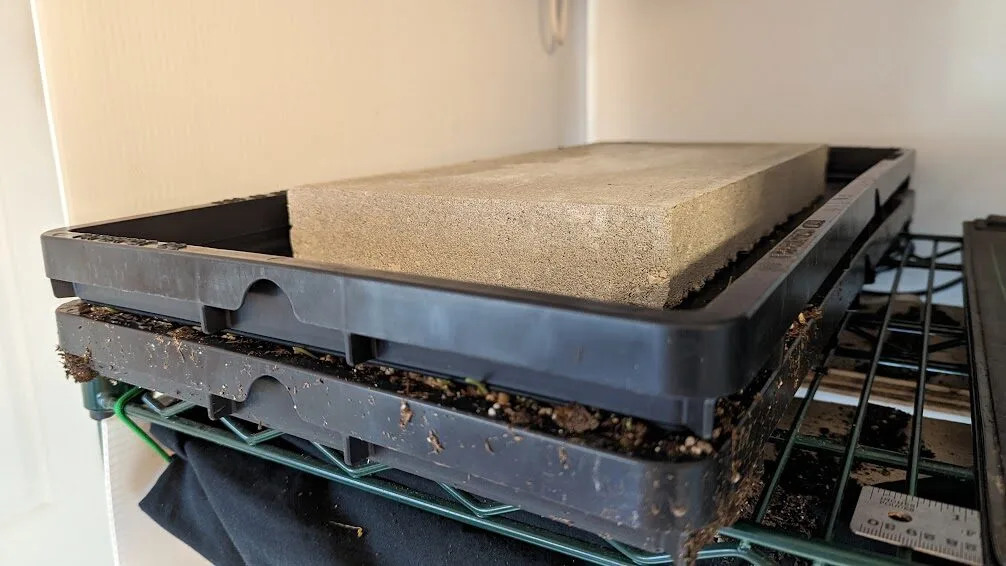
To support the germination stage, many growers use a method called stacking.
This technique involves placing trays in stacks of three (though some stack higher), capping the top tray with an empty one, and adding weight—often a 14-pound paver or brick—to the top.
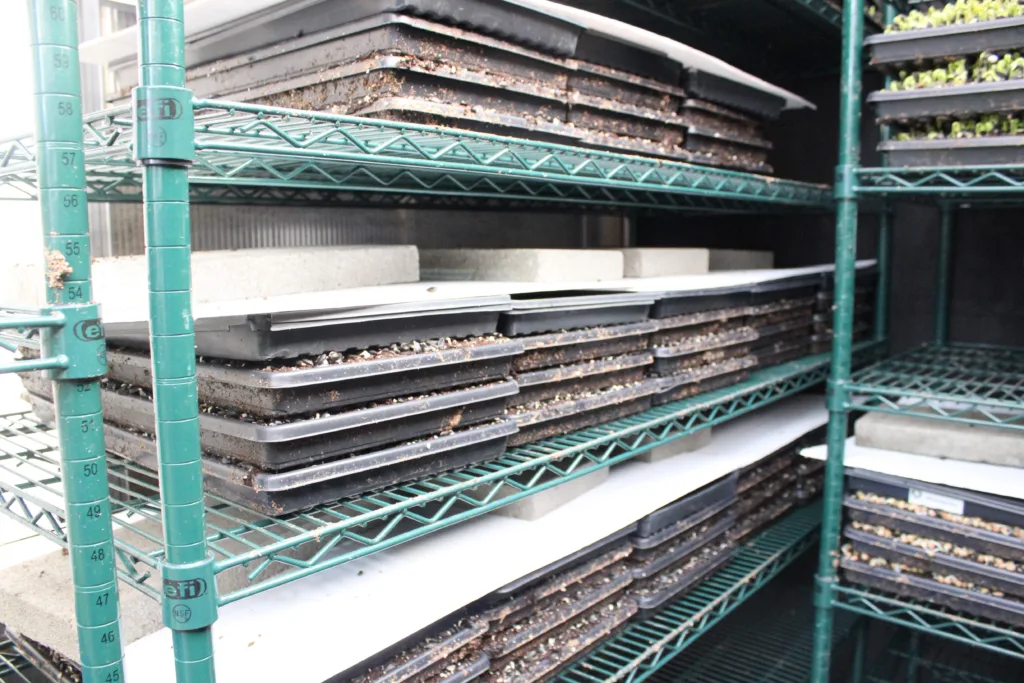
⚠️ Important: Avoid stacking too high. Excessive weight can put too much pressure on the bottom trays or cause stacks to become unstable as the crops begin to grow.
Why Stacking is Beneficial
Stacking trays during germination offers several key benefits:
Improves seed-to-soil contact
The pressure from above ensures seeds stay firmly pressed into the soil, improving moisture uptake and boosting germination rates.
Locks in moisture
Covered trays retain humidity, reducing the need to water again until the light stage. This helps prevent both under- and overwatering early on.
Strengthens seedling stems
The added weight requires seedlings to push upward with more force, which can result in stronger, more resilient stems.
Encourages uniform growth
Crops that tend to grow unevenly benefit from the compression, resulting in a more level canopy by harvest time.
Delays photosynthesis
Keeping crops in the dark at this stage prevents early exposure to light, which in some varieties can trigger bitterness or uneven growth.
Saves space
Stacking allows you to germinate a large number of trays in a compact footprint—especially useful in small grow spaces.
Discourages overhandling
Since the trays are weighted and stacked, you’re less likely to peek in or disturb the seedlings during this critical stage.
Knowing When Germination is Complete
You’ll know it’s time to unstack and uncover when seedlings begin lifting the upper trays. Different crops respond on their own timelines, so experience and observation will help refine your timing.
As a general rule, it’s better to uncover slightly early than too late:
- Early uncovering helps prevent mold and damping-off diseases.
- Late uncovering can cause stems to bend or become deformed under pressure.
- If you notice shoots curling out the sides or lifting the trays off entirely, you’ve likely waited a bit too long.
Some crops, like sunflowers, handle a longer germination window well. Others, like amaranth, benefit from an earlier uncovering to prevent delicate stems from becoming weak or overextended.
Blackout Stage (Optional)
The blackout stage is an optional phase used by some growers immediately after germination. It involves keeping the crop covered—without stacking—to delay light exposure and encourage the seedlings to stretch upward.
This technique can result in taller crops, which may be easier to harvest, especially when working with very short varieties. However, stretching the crop this way often comes at a cost: the greens may be less sturdy, and their shelf life can suffer compared to crops grown with full light exposure from the start.
For most microgreens, we don’t recommend using a blackout stage as part of your standard routine. It adds complexity to your crop planning schedule and isn’t necessary when conditions and seed quality are ideal.
That said, the blackout stage can still be a useful tool in certain scenarios:
- If you’re working with a slow-growing seed lot
- When trying to coax a bit of extra height out of short crops like amaranth or basil
Think of the blackout stage as a strategy to use selectively, rather than a default part of every crop cycle.
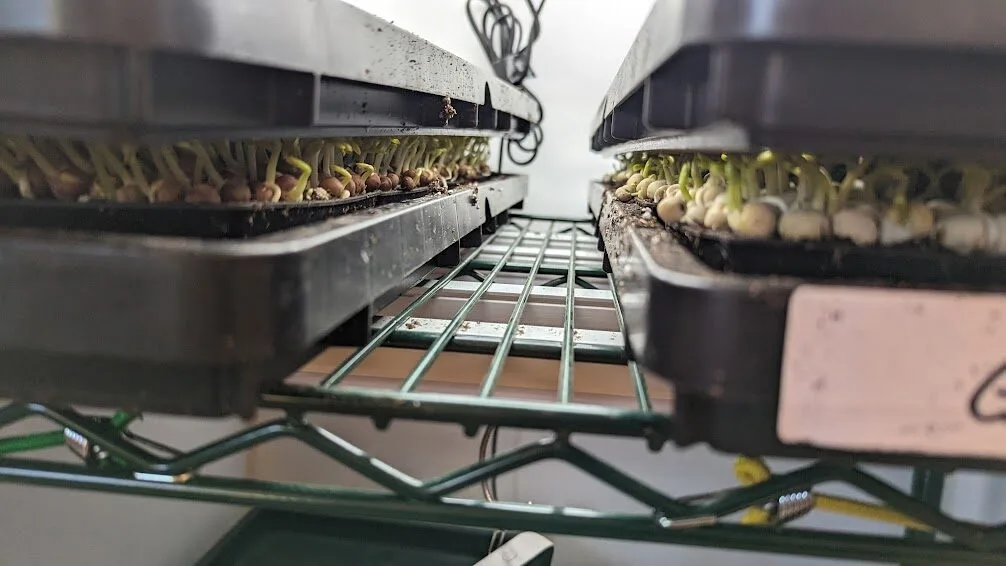
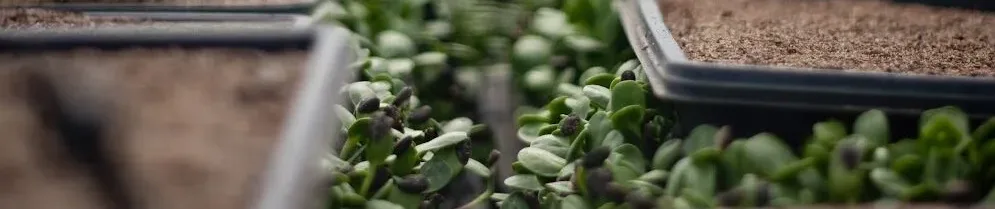
The Photosynthesis Stage
Once germination is complete—and after the optional blackout phase, if used—microgreens are exposed to light to begin photosynthesis. This is the stage where crops transition from pale yellow to vibrant green (or red, depending on the variety) as they start producing chlorophyll.
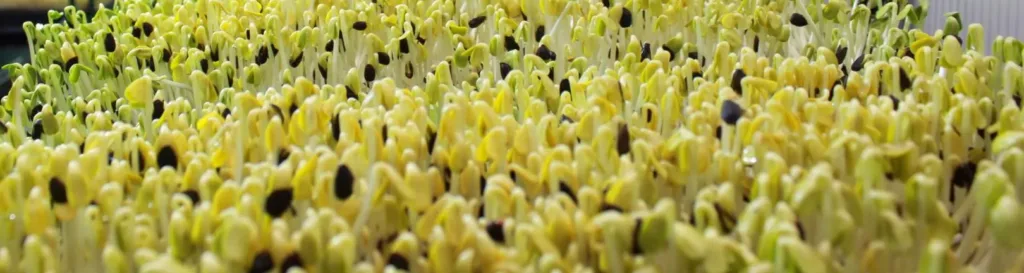
At first uncovering, it’s normal for your crops to look yellow. This is simply due to the lack of light during germination. As photosynthesis kicks in, they quickly green up and develop the color, structure, and flavor you expect.
Crops generally spend three to six days in the light, though the exact duration depends on the variety, temperature, and intensity of your lighting system. Keep in mind that more time isn’t always better—overexposure to light can cause microgreens to become bitter, tough, or fibrous, reducing their quality and palatability.
The photosynthesis stage is the final phase in the crop cycle, and managing it well is key to delivering vibrant, flavorful, and nutrient-rich microgreens.
Lighting to Power Your Crops
Lighting plays a critical role in microgreens production, especially in indoor systems. While natural sunlight is an excellent option, many growers rely on artificial lighting to provide consistent light levels year-round.
Light Sources: LED vs. Fluorescent
Microgreens can be grown using natural sunlight, LEDs, or fluorescent lights.
- LEDs are quickly becoming the preferred option. They’re energy-efficient, long-lasting, and emit very little heat—making them easier to manage in temperature-sensitive systems. As prices continue to drop, they’re becoming more accessible to small and large growers alike.
- Fluorescent lights are another solid choice. They use relatively little energy and are widely available, though they do emit more heat than LEDs. This can be an advantage in cooler grow spaces—but a challenge in warmer environments where temperature control is already an issue.
How Many Lights Do You Need?
The number of lights required depends on their output and intensity. Higher-output lights can often cover an entire shelf with just one fixture. Lower-output lights may require two to three per shelf to ensure even coverage. Reflectors also play a role in how light is concentrated and distributed.
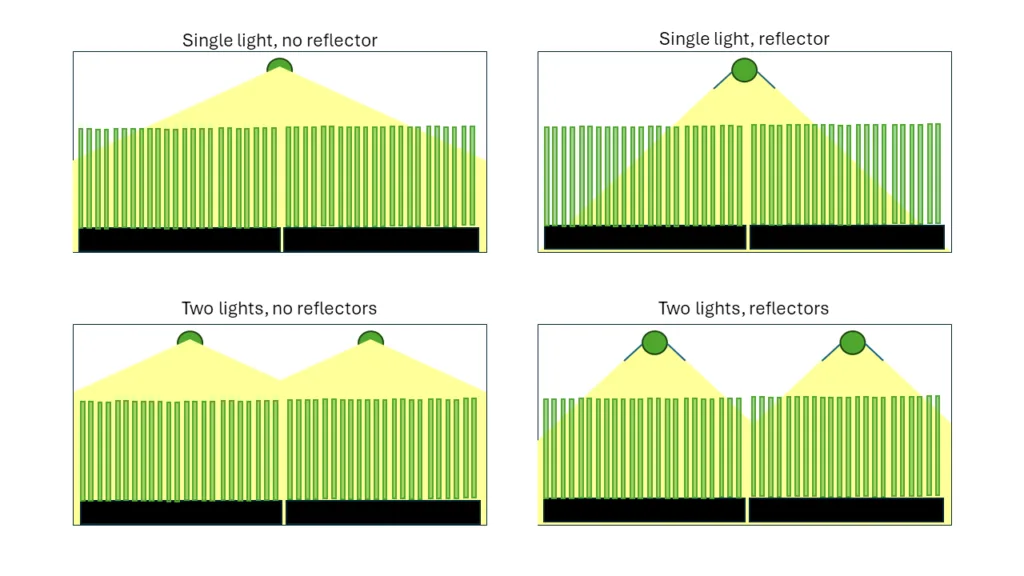
Always check the manufacturer’s recommendations and test your coverage area. Uneven lighting can lead to uneven growth.
Understanding Light Color
Light color is measured in Kelvins (K). For microgreens, 6500K is ideal—it’s high in the blue light spectrum (400–500 nm), which supports strong vegetative growth.
You can go as low as 5000K and still produce a healthy crop, but as the Kelvin value drops, crops may become less vibrant and robust. Lights below 5000K tend to promote stretching or legginess and may reduce yield and appearance.
Now, in reality, lighting is more complex than that. But this is a reasonable place to start!
Ideal Lighting Duration
Microgreens generally thrive under 14 to 18 hours of light per day. This can vary depending on crop type, light intensity, and system design. If you’re using high-quality lights, you might be able to reduce hours to save on energy while still maintaining good growth.
Signs of improper lighting:
- Too little light: Crops will lean or stretch toward the light source.
- Too much light: Crops may become stunted, overly dark in color, or develop off flavors.
Using a timer is a simple and effective way to maintain consistent lighting schedules and avoid stress caused by irregular light cycles.
Measuring Light for Microgreens
While we often think of light in terms of watts or lumens, what really matters for plants is photosynthetic photon flux density (PPFD). This measures how much light useful to plants (photosynthetically active radiation, or PAR, in the 400–700 nm range) actually reaches the crop canopy.
- PPFD is measured in µmol/m²/s
(1 µmol ≈ 6 x 10¹⁷ photons, depending on wavelength)
Many modern grow lights include a PPF value (the total light output from the fixture), but PPFD reflects what the crop receives, which declines as the light is positioned further from the plants.
Recommendations vary, but much research suggests grow well within a PPFD range of 25 to 85 µmol/m²/s. I have had great results between 150 and 200 µmol/m²/s – BUT too much light can also lead to bitterness or stunting if not managed carefully.
Growing with Sunlight
If you have access to natural sunlight, take advantage of it. Microgreens grown in full-spectrum daylight often develop superior color, flavor, and structure. Sunlight is ideal in:
- Greenhouses
- Sunrooms
- Tabletop greenhouses
That said, sunlight intensity can become a challenge, especially in the summer when excessive heat may stress your crops. In these cases, shade cloth can help moderate light and temperature. During the winter, when days are shorter, supplemental lighting (LEDs, fluorescents, or metal halides) may be needed to maintain consistent crop cycles.
Watering Your Microgreens
Once your trays are exposed to light, regular watering becomes essential to support growth and maintain crop quality. The two primary watering methods are overhead watering and bottom watering, and each has its strengths depending on the crop and stage of growth.
Overhead Watering
Overhead watering is typically done using a micro spray system or a hand-held watering wand with a shower-style nozzle. For most microgreens, applying overhead water right after uncovering from germination is beneficial. It helps rinse away any residual debris and rehydrates the crop after days in the dark, jumpstarting photosynthesis.
After this initial watering, most crops do better with bottom watering. However, some crops—particularly sunflower, pea, and wheatgrass—prefer overhead watering for their entire life cycle, as it more closely mimics the conditions in which they thrive.
Bottom Watering
Bottom watering typically involves setting the growing tray into a shallow tray of water, allowing the soil to absorb moisture through drainage holes. This is usually done by placing a 1020 tray with holes into a solid-bottom 1020 tray filled with water.
A more advanced method of bottom watering is through using a capillarity mat, as shown on the right.
When properly set up, capillarity mats can virtually eliminate the need for manual watering.
Bottom watering is especially helpful for delicate crops that are prone to disease when leaves, stems, or the soil surface are kept too wet. It keeps moisture in the root zone while leaving the canopy dry and harvest-ready.
However, it’s important not to overdo it—bottom watering can lead to soil saturation if trays are left sitting in water too long.
Understanding Soil Saturation
Soil is made up of three essential components: solids, liquids, and gases. While water is critical for plant growth, roots also need oxygen to respire. In a healthy soil, the pore spaces between particles allow for airflow. When soil becomes fully saturated, water fills these pores, creating anaerobic conditions (no oxygen), which can promote root diseases and stunted growth.
To avoid this, water only enough to rehydrate the soil—not to soak it. Proper drainage and regular monitoring are key to preventing disease and supporting healthy root development.
Creating a Watering Schedule
How often you water depends on several factors:
- Crop type
- Soil depth
- Ambient temperature
- Air circulation
In general, most growers water once per day under normal conditions and twice daily in hotter environments. Using deeper trays (like 2-inch trays) can reduce how often you need to water by increasing the soil’s water-holding capacity.
By observing your crops daily, feeling tray weight, and monitoring soil moisture levels, you’ll develop an instinctive sense for when and how much to water—one of the most valuable skills for any microgreens grower.
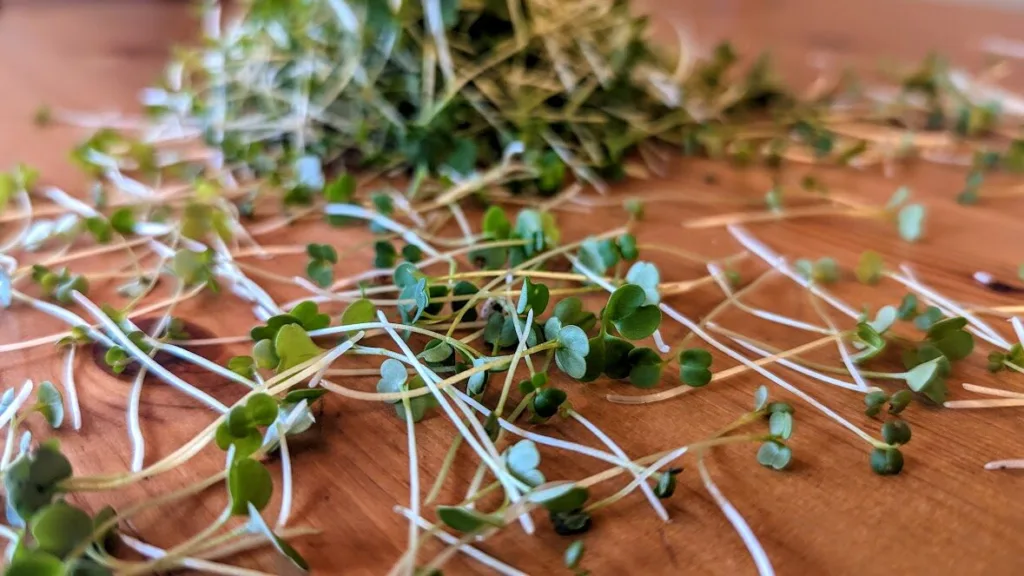
Harvesting Your Microgreens Crop
Once your microgreens have reached the desired maturity, it’s time to harvest. This is the moment where your careful planning, watering, and monitoring ready you to turn your crop into a ready-to-sell product.
Tools and Technique
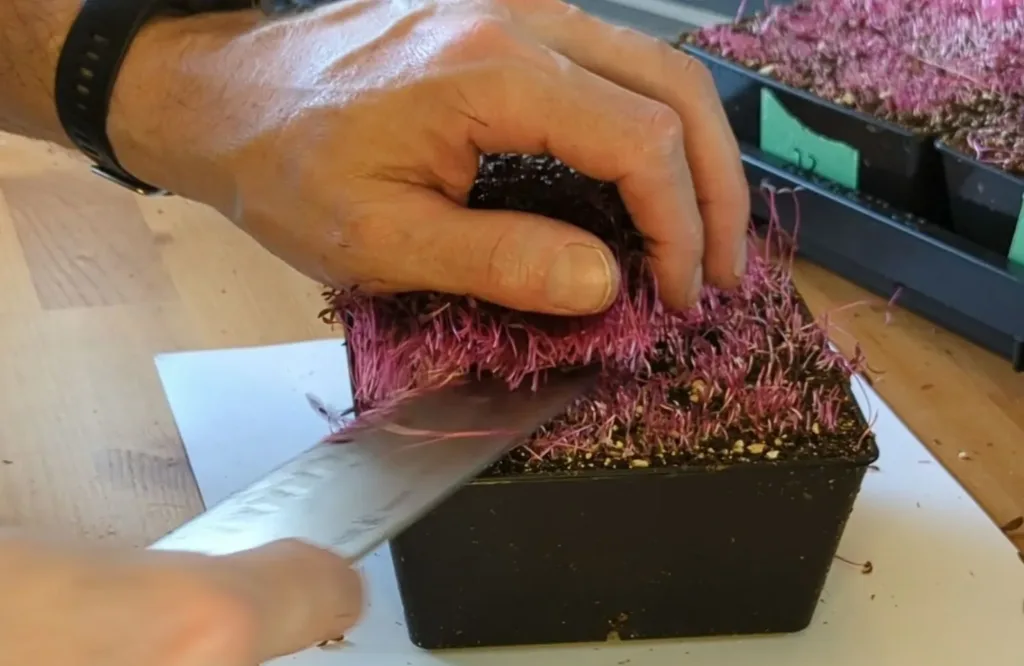
The best tool for harvesting microgreens is a sharp, straight-edged knife. Cut the crop close to the soil line using a smooth, steady motion.
A clean cut not only looks better but also helps maintain product quality by minimizing stem bruising and damage.
There are two common knife types used by growers:
- Kitchen knives: Available in various sizes and styles, these offer comfort and precision. Choose one that feels balanced in your hand.
- Produce knives: These are more industrial and affordable, hold an edge reasonably well, and are built for repetitive use. However, they may lack the ergonomic comfort of kitchen knives.

Avoid serrated blades—they tear rather than cut, which can shorten your product’s shelf life by damaging stem tissue and increasing the risk of post-harvest decay.
Maintaining a Sharp Edge
A sharp blade is essential for clean cuts and efficient harvesting. Dull knives can crush stems, slow down your workflow, and negatively affect product quality.
- Use a preset or adjustable knife sharpener to keep your blade sharp with minimal effort.
- If you have experience, a whetstone offers the most control for fine edges.
- A kitchen steel is useful for honing your blade between sharpenings.
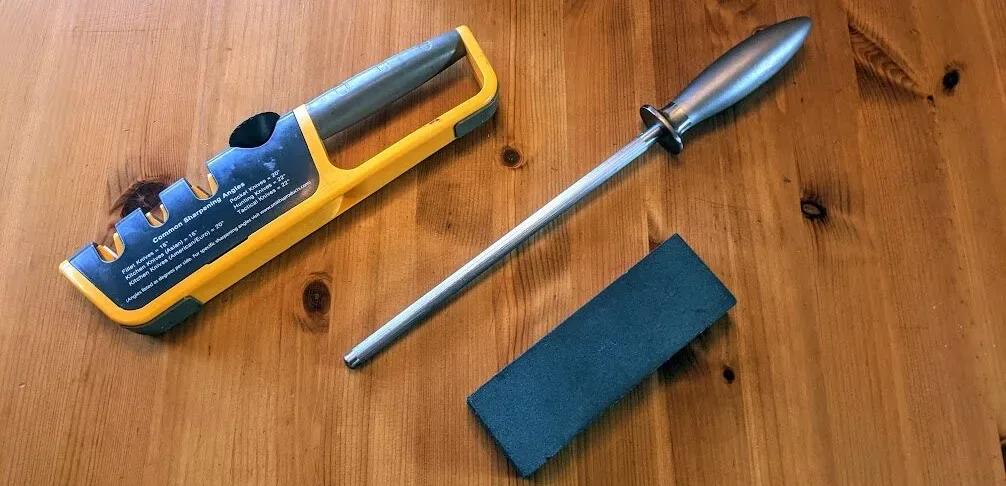
Sharpen your knife before each harvest, and hone the edge every 4 to 5 trays to keep it performing well throughout your session.
Packaging Microgreens
Once your microgreens are harvested, it’s time to package them. Many growers prefer to cut and pack simultaneously to reduce handling and keeping stems neatly aligned. This approach not only improves efficiency but also enhances the visual presentation of the product.
To streamline your process, pre-label your containers before harvest begins. This helps keep the post-harvest workflow fast and organized.
Once packed, get your product into refrigeration right away. Cold storage is essential for preserving freshness, shelf life, and food safety. Be sure to maintain cold temperatures throughout transport as well.
Packaging Materials
Most microgreens are packaged in plastic or biodegradable clamshell containers. A good package does more than hold product—it protects it, presents it well, and communicates your brand.
Your choice of packaging can become a key part of your marketing strategy.
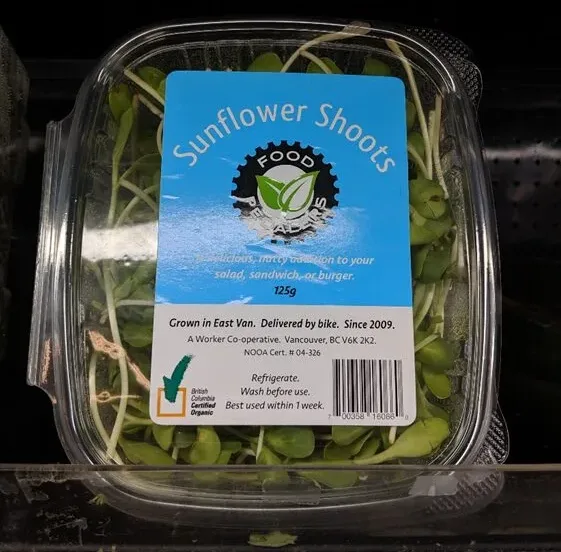
Be sure to check your local regulations for labeling requirements. Most jurisdictions require something like the following information:
Required on Labels:
- Product common name
- Company name and location
- Product weight
- Storage instructions (e.g., “Keep Refrigerated”)
- Washing/use-by instructions
- Organic certification or similar claims (if applicable)
Optional Additions:
- Product description
- Company story or values
- UPC code or barcode for retail sales
Cost Considerations
Packaging is a significant expense that often surprises new growers. Each tray of microgreens typically yields 5 to 10 packages, and depending on your materials, packaging may cost $2 to $5 per tray—or more. In a modest $144,000/year operation, packaging alone could cost over $16,000 annually.
Carefully track your packaging expenses, and don’t forget to include them in your pricing strategy.
Selling Live Crops
Some growers choose to sell live trays of microgreens, which can be appealing to chefs and direct-to-consumer markets. If going this route, it’s best to deliver the trays before full maturity so the crop can continue to grow until used.
However, live crops begin to decline in quality once they leave your controlled environment, so it’s important to handle and transport them carefully. Use containers or boxes to reduce movement, exposure, and contamination risk during delivery., though crops continue to grow and quality may decline after leaving your grow system.
Microgreens Crop Planning
Effective crop planning is a cornerstone of a successful microgreens operation. It ensures you grow exactly what you need—enough to fulfill orders without overproducing and creating waste.
At its core, crop planning involves working backward from your desired harvest date. By knowing each crop’s days to maturity (DTM), you can determine when to soak, sow, and uncover to meet your target delivery date.
For growers with weekly harvest cycles, sowing days quickly become routine. However, the quantities you plant will shift each week depending on your sales volume and specific orders. Tracking this information and adjusting your plan accordingly is what keeps your system efficient and profitable.
Want to Streamline your Crop Planning?
Explore the SeedLeaf crop planner to build accurate, order-driven sowing schedules in minutes.
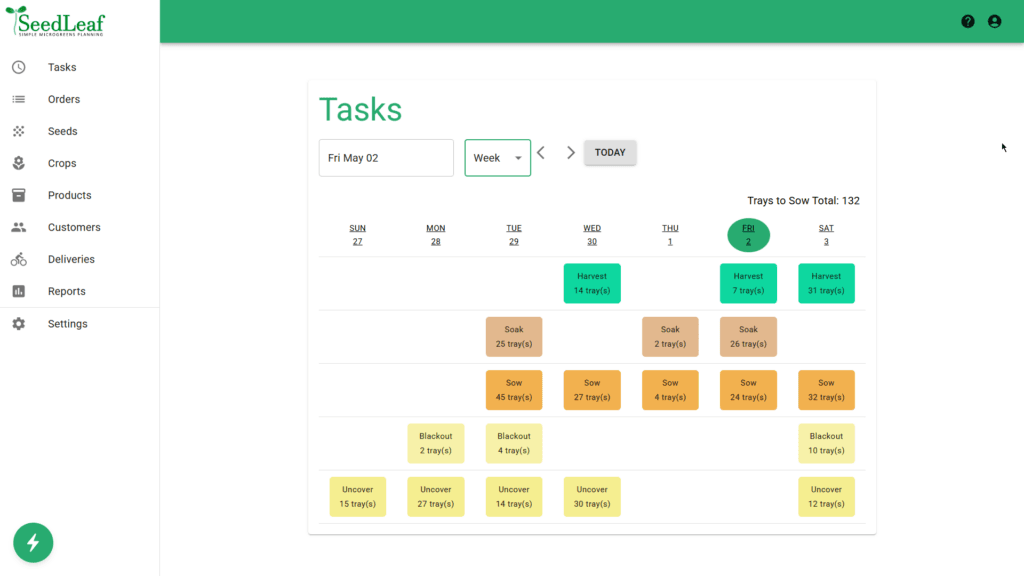
Crop planning isn’t just about logistics—it’s how you align production with real-world demand. Done well, it helps you minimize waste, manage labor, and deliver reliably week after week.
Standard Operating Procedures (SOPs)
Developing Standard Operating Procedures (SOPs) is a crucial step in establishing a consistent and efficient microgreens business. SOPs are detailed, written instructions that outline how to perform specific tasks within your operation. They serve as a foundational tool to ensure consistency, quality, and compliance across all aspects of your business.
Why SOPs Matter
- Consistency: SOPs ensure that every task, from seeding to packaging, is performed uniformly, leading to consistent product quality.
- Training: They provide a clear framework for training new staff, reducing the learning curve and minimizing errors.
- Compliance: Health authorities often require documented procedures during inspections, making SOPs essential for regulatory compliance.
- Efficiency: Clear procedures streamline operations, saving time and resources.
Key Areas for SOP Development
Consider creating SOPs for the following areas:
- Tray Preparation: Steps for soil mixing, tray filling, and leveling.
- Seed Soaking and Sanitization: Guidelines for soaking times, sanitization methods, and handling procedures.
- Seeding Techniques: Instructions for different seeding methods like dump-and-spread, sprinkle, or using a drop seeder.
- Germination and Stacking: Procedures for stacking trays, applying weights, and monitoring germination progress.
- Watering Practices: Protocols for overhead and bottom watering, including schedules and techniques.
- Lighting Management: Guidelines for light intensity, duration, and equipment maintenance.
- Harvesting Methods: Steps for cutting, handling, and preparing microgreens for packaging.
- Packaging and Labeling: Procedures for packaging types, labeling requirements, and storage conditions.
- Sanitation and Cleaning: Cleaning schedules, methods, and materials for maintaining hygiene.
- Record-Keeping: Documentation practices for tracking growth cycles, yields, and any issues encountered.
Tips for Creating Effective SOPs
- Be Clear and Concise: Use straightforward language and avoid jargon to ensure understanding.
- Use Visual Aids: Incorporate photos, diagrams, or flowcharts to illustrate steps.
- Include Checklists: Provide step-by-step checklists to guide employees through procedures.
- Regularly Review and Update: SOPs should be living documents, updated as processes evolve or improve.
- Ensure Accessibility: Store SOPs in a location accessible to all staff, whether digitally or in print.
Compliance and Inspection Readiness
Having well-documented SOPs is not only beneficial for daily operations but also critical during health inspections. Inspectors often request to see SOPs to verify that your business adheres to food safety and handling regulations. Comprehensive SOPs demonstrate your commitment to maintaining high standards and can facilitate smoother inspections.
Microgreens Hygiene and Sanitation
Maintaining a strong hygiene and sanitation program is essential in any microgreens production system. It protects your customers and your crops by minimizing the risk of contamination from human pathogens and crop diseases. A comprehensive hygiene and sanitation plan should be fully integrated into your Standard Operating Procedures (SOPs).
Components of Sanitation
A well-rounded sanitation program includes three distinct but interconnected components: Handling Hygiene, Routine Sanitation, and Periodic Sanitation.
Handling Hygiene
Clean hands and mindful movement are your first line of defense.
Since growers and staff frequently handle equipment and crops, it’s essential to minimize cross-contamination risks. This means:
- Ensuring all staff are trained in safe food handling practices
- Practicing regular handwashing, even when wearing gloves
- Handling harvested crops and packaging materials with care to prevent contamination
- Minimizing unnecessary movement between production zones to reduce the risk of spreading contaminants
Good personal hygiene helps maintain product quality and protects consumer health.
Routine Crop Production Sanitation
Routine crop production sanitation tasks should be performed every crop cycle. These include:
- Sanitizing seeds before soaking or sowing
- Washing and sanitizing all tools and containers used in harvest and packing
- Cleaning production tools, such as trays, shelves, racks, and soaking bins
- Sweeping and mopping floors to control debris and dust buildup
These consistent tasks form the foundation of a clean workspace and must be done thoroughly and reliably.
Periodic Sanitation
In addition to regular cleaning, periodic deep cleaning ensures your space remains hygienic over time. This includes:
- Cleaning walls and vertical surfaces
- Reaching and sanitizing areas that are often missed in daily routines (e.g., under shelves, corners)
- Sanitizing delivery vehicles and transport supplies to prevent contamination off-site
Periodic sanitation helps eliminate hidden risks and ensures your production environment meets health and safety standards.
Certification and Training
If you’re selling microgreens to the public, your hygiene and sanitation protocols must meet food safety regulations. To strengthen your knowledge and compliance:
- Consider enrolling in a type of FoodSafe course (many are available online)
- For larger-scale or retail-focused operations, explore implementing a Hazard Analysis Critical Control Point (HACCP) plan
Being proactive about food safety increases customer trust and may be required for selling to grocers or institutional buyers.
Task Logs: Verifying What Gets Done
Creating a strong hygiene and sanitation plan is important—but verifying that it’s followed is just as critical.
This is where task logs come in.
- Task logs provide proof that procedures are being completed according to your SOPs.
- Logs should be filled out each time a sanitation task is completed.
- Digital tools like Google Forms are a convenient way to track these tasks and keep records centralized and accessible.
If it isn’t logged, it didn’t happen!
Keeping accurate records builds accountability and improves food safety audit readiness
Common Microgreens Crop Problems
Even the most experienced growers run into crop issues from time to time. Understanding the most common problems—and what causes them—can help you spot issues early and take corrective action before your yields or quality suffer.
Poor Germination
Weak or uneven germination is often linked to one or more of the following factors:
- Uneven soil distribution
If your trays have low or uneven spots, seeds may not make consistent contact with the soil, reducing germination—even if trays are weighted. With small seeds, even subtle dips in the soil surface can cause problems. - Dry soil
Germination requires moisture. If your soil isn’t properly hydrated at sowing—especially with unsoaked seeds—germination rates will drop. - Improper stacking
During germination, seed-to-soil contact is crucial. If stacks don’t have enough weight, seeds may not press firmly enough into the soil to absorb moisture and initiate sprouting. - Cool temperatures
Most seeds need warmth to germinate. If your grow room runs cool, consider using a heat mat or moving trays to a warmer part of your space for germination. - Old or poor-quality seed
Seed quality declines over time, especially if not stored correctly. Buy from reputable suppliers, and store your seed in cool, dry conditions to preserve viability.
Surface Mold
Surface mold can appear if the soil is too wet during germination. To reduce risk:
- Water only enough to moisten the soil—not saturate it.
- Reduce sowing density to improve air circulation if mold is persistent.
- Improve overall airflow and ensure proper sanitation in your grow space.
Mold is more likely to thrive in systems where humidity is high and cleaning practices are inconsistent.
Damping Off
Damping off is a fungal condition that can cause young shoots to collapse and die quickly—especially in small-seeded crops.
To prevent it:
- Avoid overwatering.
- Use bottom watering to keep the soil surface drier.
- Ensure trays are not overcrowded.
- Some growers have success using biological controls, like Trichoderma, a beneficial fungus that can suppress harmful pathogens.
Wilting
The most common cause of wilting is underwatering. Unfortunately, once a crop wilts, it rarely recovers fully—and yields often suffer.
Be proactive:
- Water consistently, especially during hot or dry conditions.
- Monitor tray weight to ensure soil moisture is adequate throughout the crop cycle.
Slow Growth
Microgreens growing slowly? A few common causes include:
- Cold temperatures
Low ambient temps are the most frequent reason for sluggish growth. Make sure your grow space is warm enough for your crop variety. - Old or low-vigor seed
Aging seed loses its vitality. Slow, uneven growth can be a sign your seed stock is past its prime. - Water stress
Even if crops aren’t wilting, inconsistent watering can still slow growth. Maintain steady moisture levels throughout the crop cycle. - Poor soil mix
Soil quality matters. A mix that’s too dense, too dry, or lacking in nutrients can dramatically impact growth. Try testing different soil blends to see what performs best in your system.
Selling Microgreens
There are many markets for microgreens—each with their own pros and cons:
| Market | Pros | Cons |
| Farmers Markets | – High selling price – Can be high-volume sales – Real-time customer engagement – Engage with other sellers | – Market fees can add up – Take lots of time – Weather dependent – Emotionally demanding! – Need to keep products cold |
| Restaurants | – High selling price -Can be high-volume sales -Good cross-promotion opportunities – Great relationship building | – Menus (and thus ingredients) can frequently change – Collecting invoices can be challenging |
| Grocers | -High sales volume potential – Great public exposure – Quick and easy deliveries – Multiple locations for chains | – Low price per unit – Collecting invoices can be challenging – May not have control over product placement – May require product certification |
| Wholesale | – High sales volume potential – Quick and easy deliveries – Wide distribution area | – Low price per unit – Collecting invoices can be challenging – No control over product placement – May require product certification |
| Home Delivery/Pick up | – High selling price – Prepayments make invoice management easy | – Must be prepaid to avoid invoice collection challenges – Picks ups can disrupt workflow – Deliveries can be challenging is customer not home |
| Subscription Service | – High selling price – Predictable sales make for effective crop planning – Prepayments make invoice management easy | – Must be prepaid to avoid invoice collection challenges – Need effective system to manage orders |
| Caterers | – High selling price – High selling volume | – Sales dependent on events – Collecting invoices can be challenging |
Microgreens Financial Planning
Sound financial planning is critical to running a successful and sustainable microgreens business. Whether you’re just starting out or scaling up, you need a clear picture of your costs, pricing, and revenue potential to make informed decisions.
Tools for Planning
You can build your own financial spreadsheet, or use resources like the Microgreens Crop and Financial Planner from Urban Micro, which provides a ready-to-use framework for tracking crop performance and projecting income and expenses on a week-by-week basis. There’s also a pre-filled Farmer’s Market Scenario sheet available to help visualize real-world sales patterns and margins.
What to Consider in Your Financial Plan
A complete financial plan goes beyond just soil and seed costs. Here are some key points to include:
- Fixed Costs Matter
Many online guides only highlight variable costs like seeds and soil. But fixed costs—rent, equipment, utilities, insurance—can be substantial. Omitting them leads to an incomplete and often overly optimistic financial picture. - Value Your Time
Track your labor and assign it a real value. This allows you to assess whether your microgreens business is truly sustainable compared to other income opportunities. - Expect Seasonal Fluctuations
Demand for microgreens may shift with the seasons. Stay ahead of slow periods with consistent marketing and a flexible crop plan. - Know Your Market
Pricing should reflect both profit margins and market expectations. Research local competitors to see what your target customers are already paying—and what they’re willing to pay again and again. - Price for Profit—and for Retention
Your prices must generate profit, but they should also encourage repeat business. Loyal customers reduce marketing costs and stabilize your revenue stream. - Use Smart Accounting Tools
Good bookkeeping and invoicing software helps streamline payments and gives you real-time insights into your business performance. Don’t rely on memory or hand-written notes—automate where possible.
A Word of Caution
Much of the online content about microgreens profitability is oversimplified or misleading. These articles often gloss over fixed costs, labor, packaging, and market volatility. While microgreens can be profitable, success depends on realistic planning and ongoing financial tracking—not wishful thinking.
In Closing
This guide has walked you through the essential components of growing microgreens commercially—from seeding and sanitation to crop planning and financial management. These foundations are critical, but truly successful microgreens operations are built through continuous learning, careful refinement, and real-world experience.
As you move forward, take time to explore each topic more deeply. Your growing system, market, and goals are unique—and the more you understand the nuances of production, pricing, and planning, the more resilient and rewarding your business will become.
Whether you’re just starting or scaling up, keep asking questions, experimenting thoughtfully, and staying rooted in good systems. That’s how a microgreens business grows strong.
Leave a Reply