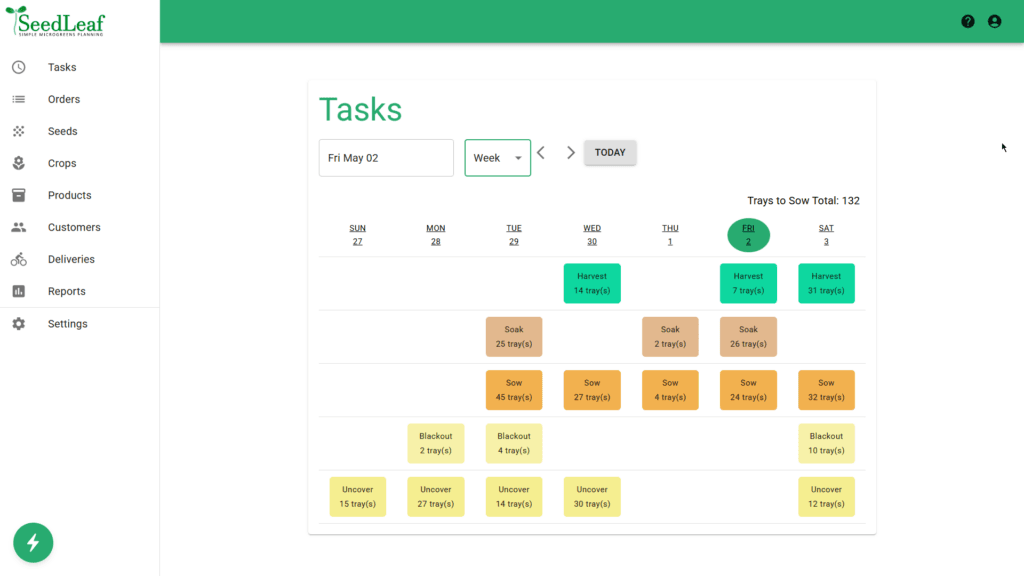
Microgreens Terminology:
A Grower’s Glossary
Essential terms every microgreens grower should know — from blackout periods to tray stacking.
Understanding the language of microgreens can help you grow better crops, troubleshoot issues, and connect with other growers. This glossary covers essential microgreens terminology used in microgreens growing — each linked to deeper articles where available.
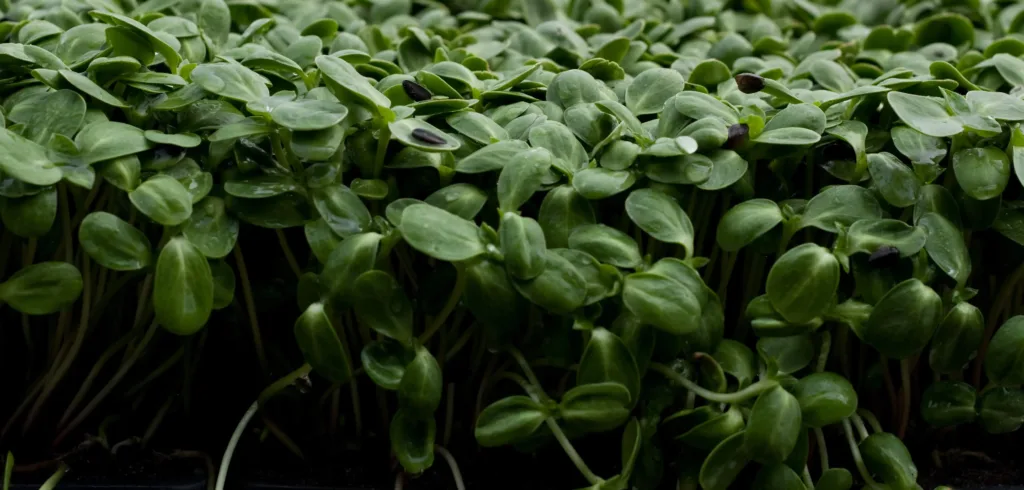
Microgreens
Microgreens are the young edible shoots of various vegetables, flowers, herbs, and grains. They grow on a cycle from 6 to 30 days, with most growing on a 7- to 12-day cycle. At harvest time, microgreens are between 2 inches (5 cm) and 6 inches (15 cm) tall.
While there are many different ways to grow microgreens, a common method is growing them in a one-inch deep 10” x 20” plastic tray (known as a “ten-twenty” tray) filled with a peat or coir-based soil mix.
Microgreens are popular with consumers for their high nutrient content and attractive appearance. For growers, they are popular due to their quick crop cycle, high value, and the ability to grow them on a small-scale – often as a home-based business.
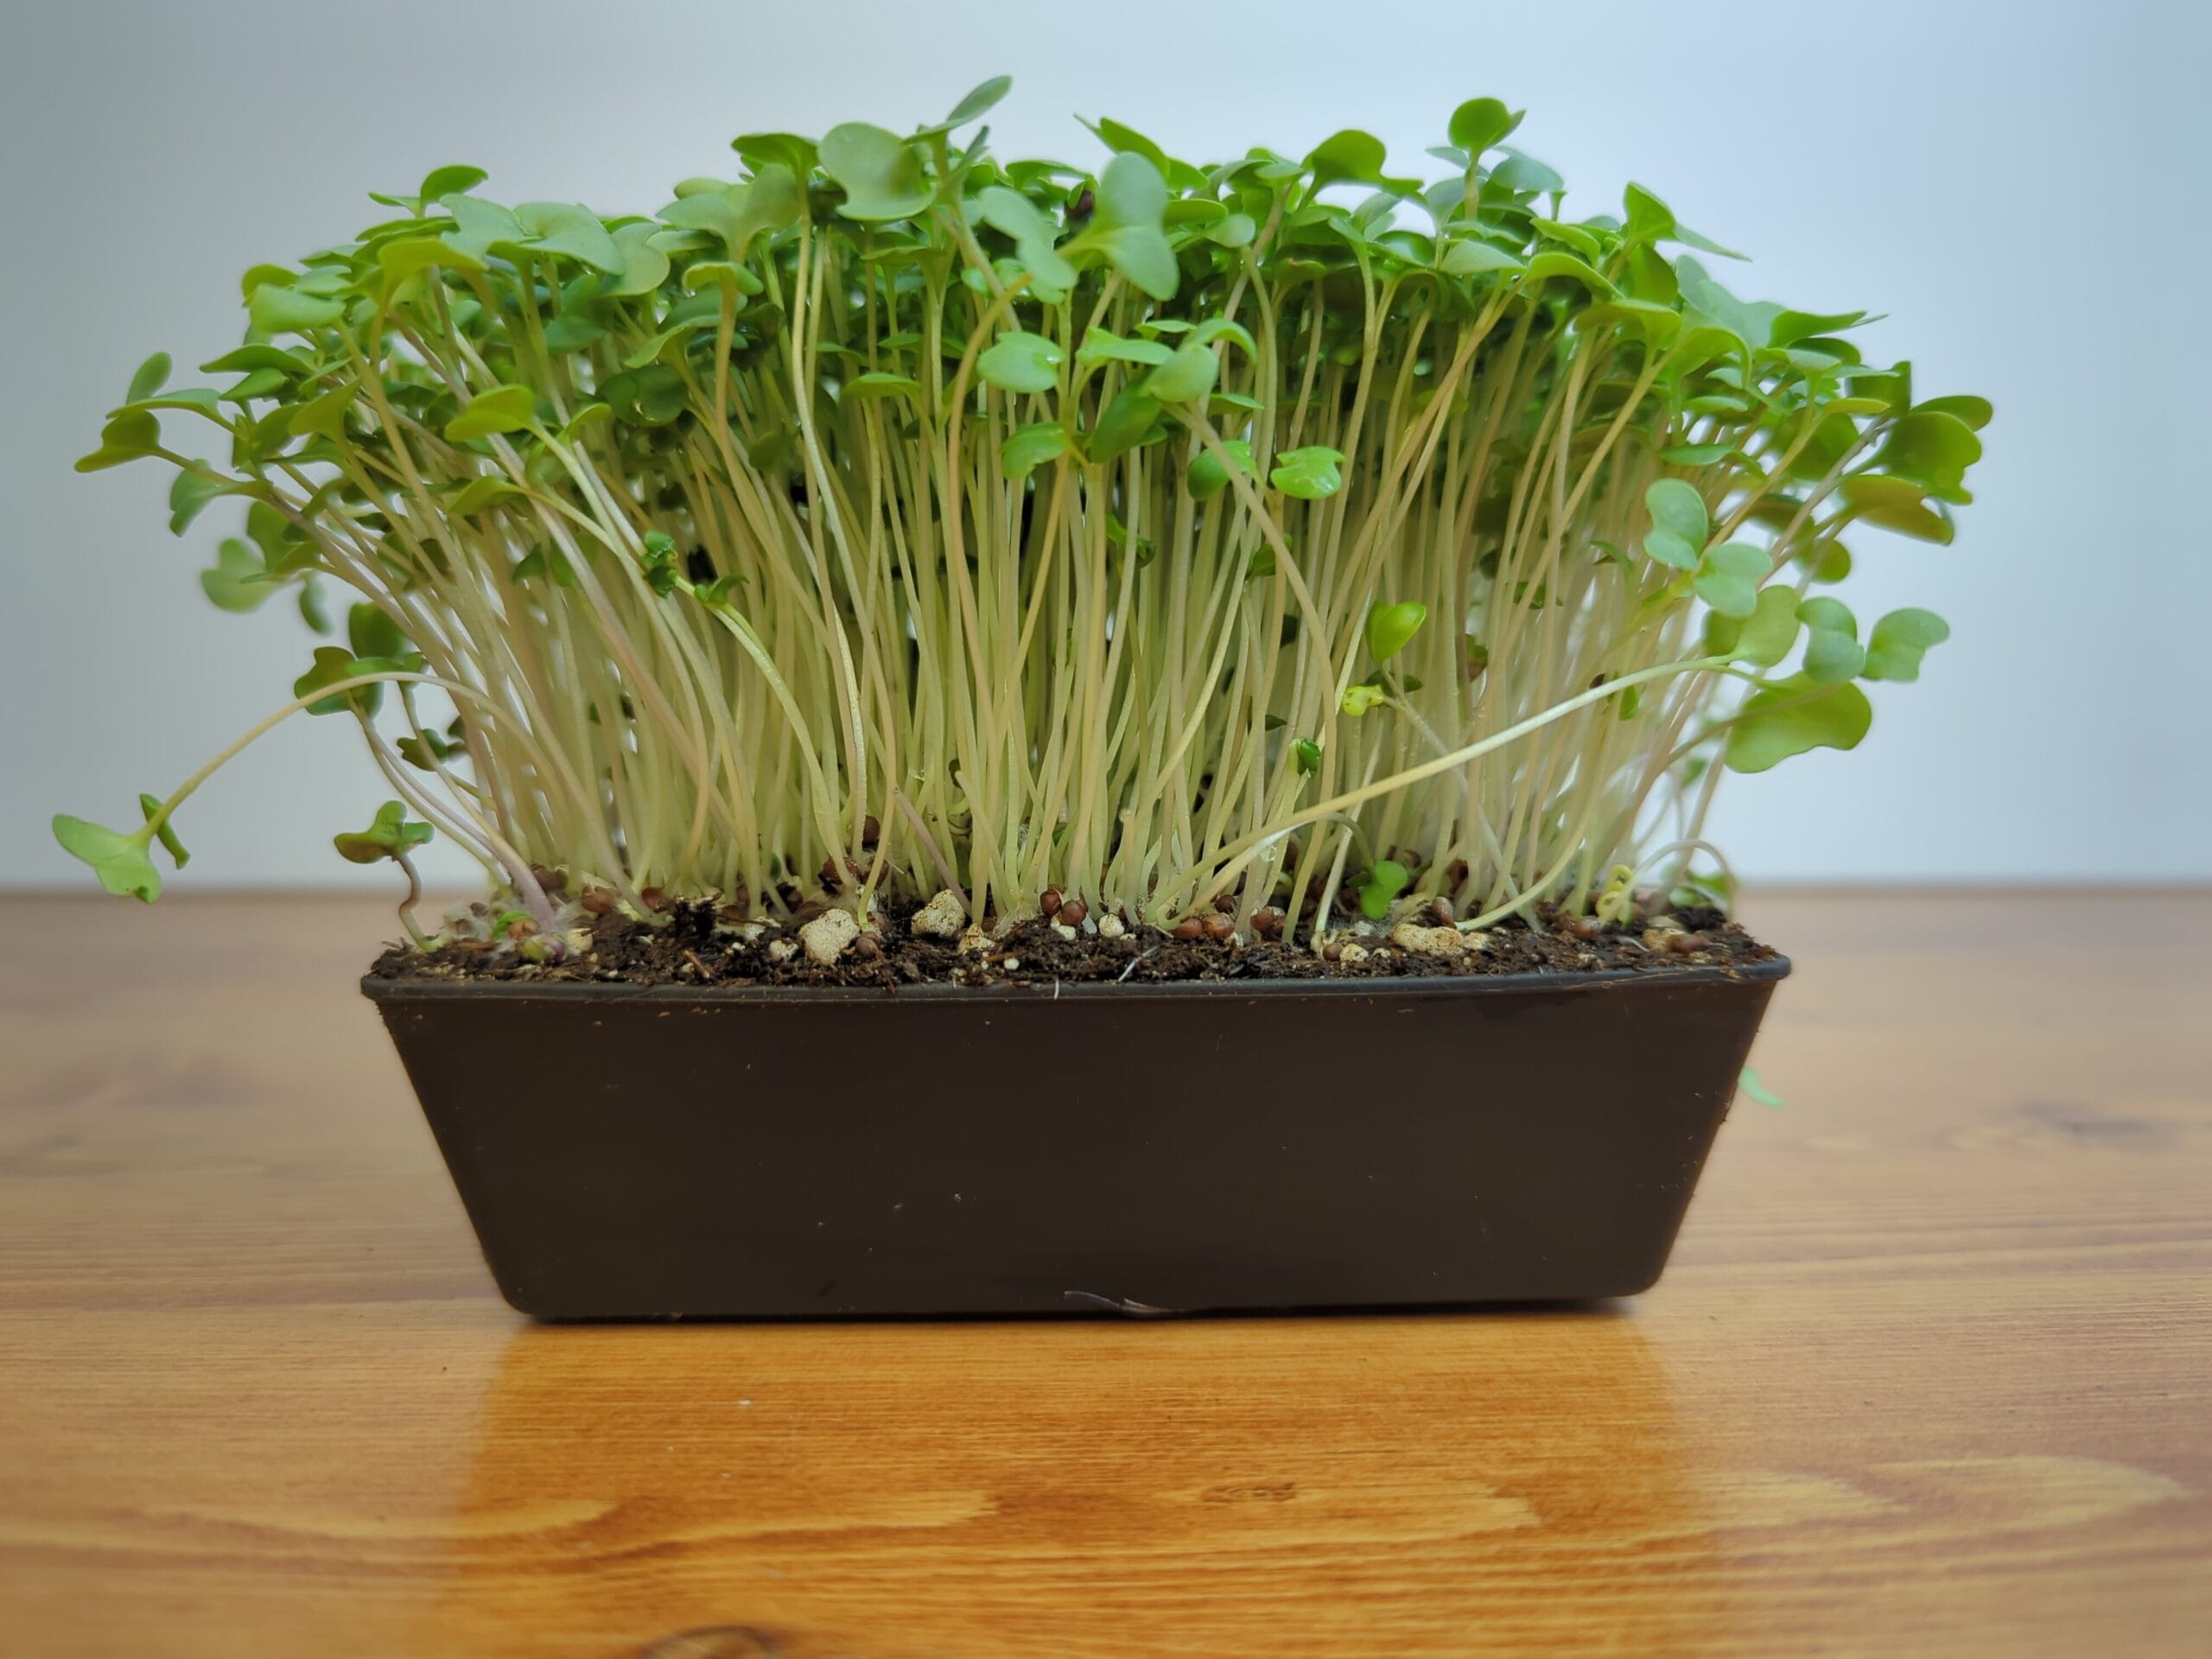
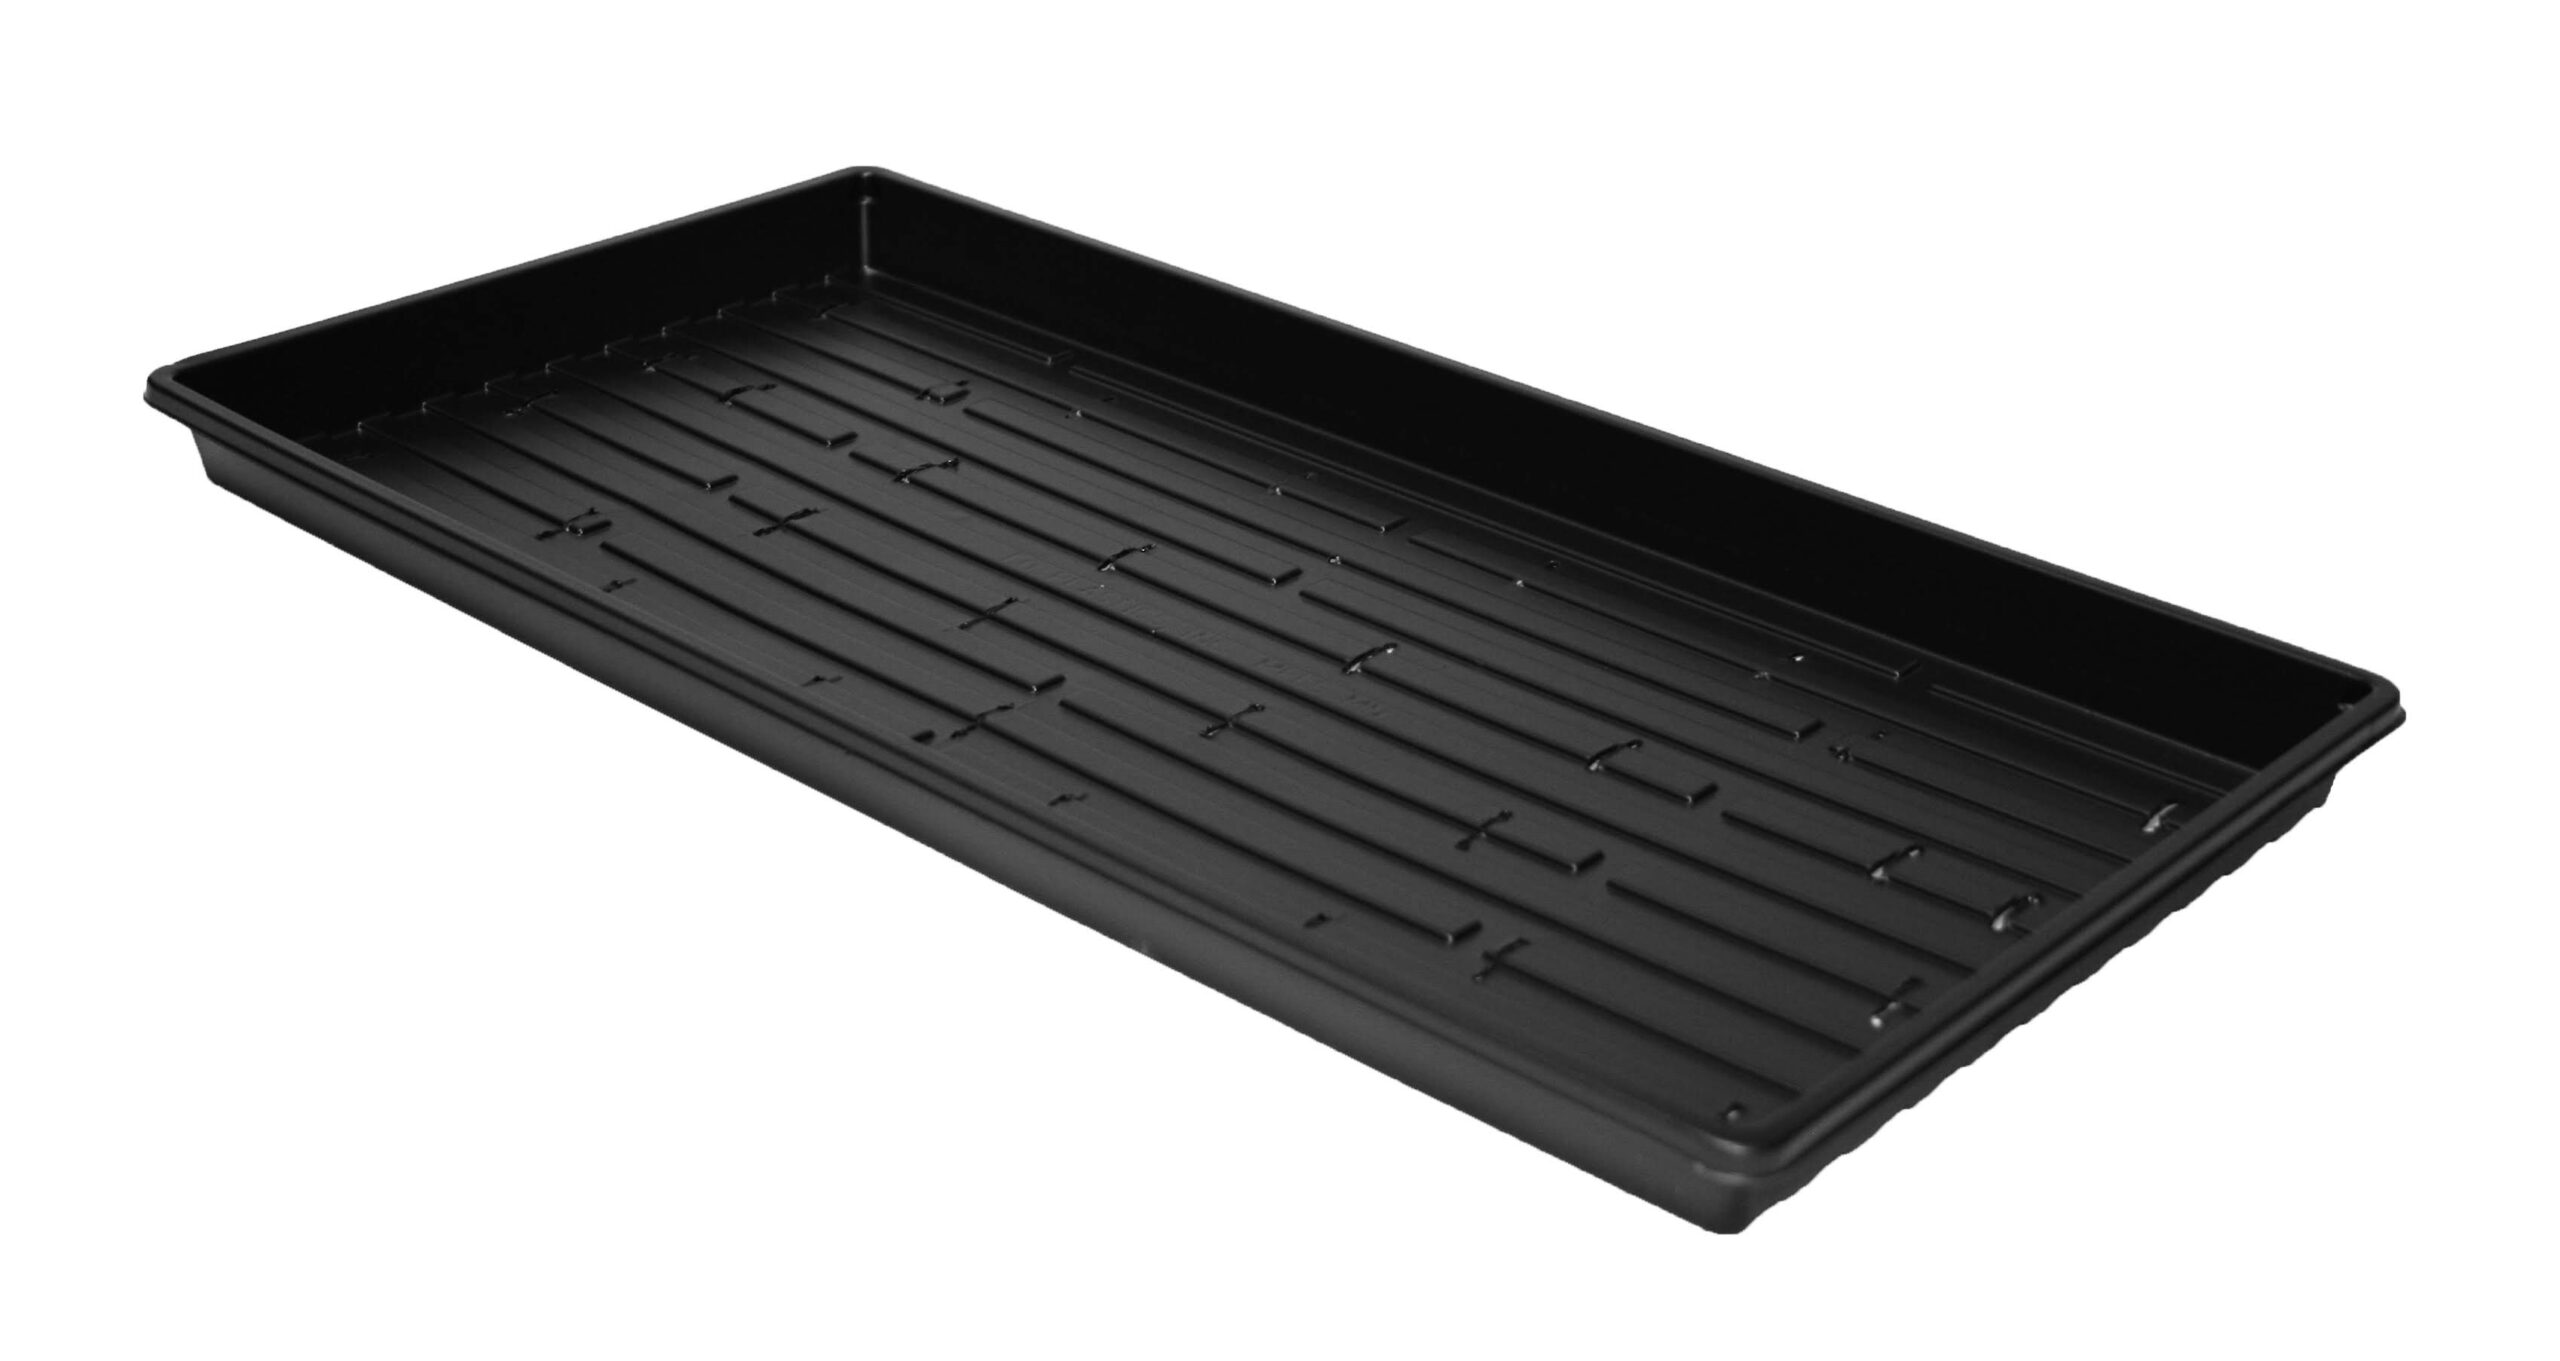
Tray
A tray is the container that holds the soil or other growing medium microgreens are grown in.
The most popular tray is the 1020 tray (10″ x 20″), but you can also commonly find 5″ x 5″ trays; 10″ x 10″ trays; and even 12″ x 24″ trays.
Trays vary in quality and price, so be sure to do your homework – generally, you get what you pay for!
Read more about trays here (coming soon)…
Crop
Crop refers to a single batch of microgreens grown from seeding to harvest – typically over a 7–21 day period, depending on the variety. Each crop is defined by its species or mix, growing medium, conditions, and growing cycle. Crops are usually grown in trays or containers, and crop success is measured by uniform germination, healthy growth, and marketable yield.
For example, a tray of radish microgreens grown over 10 days on soil under LED lights is considered one crop.
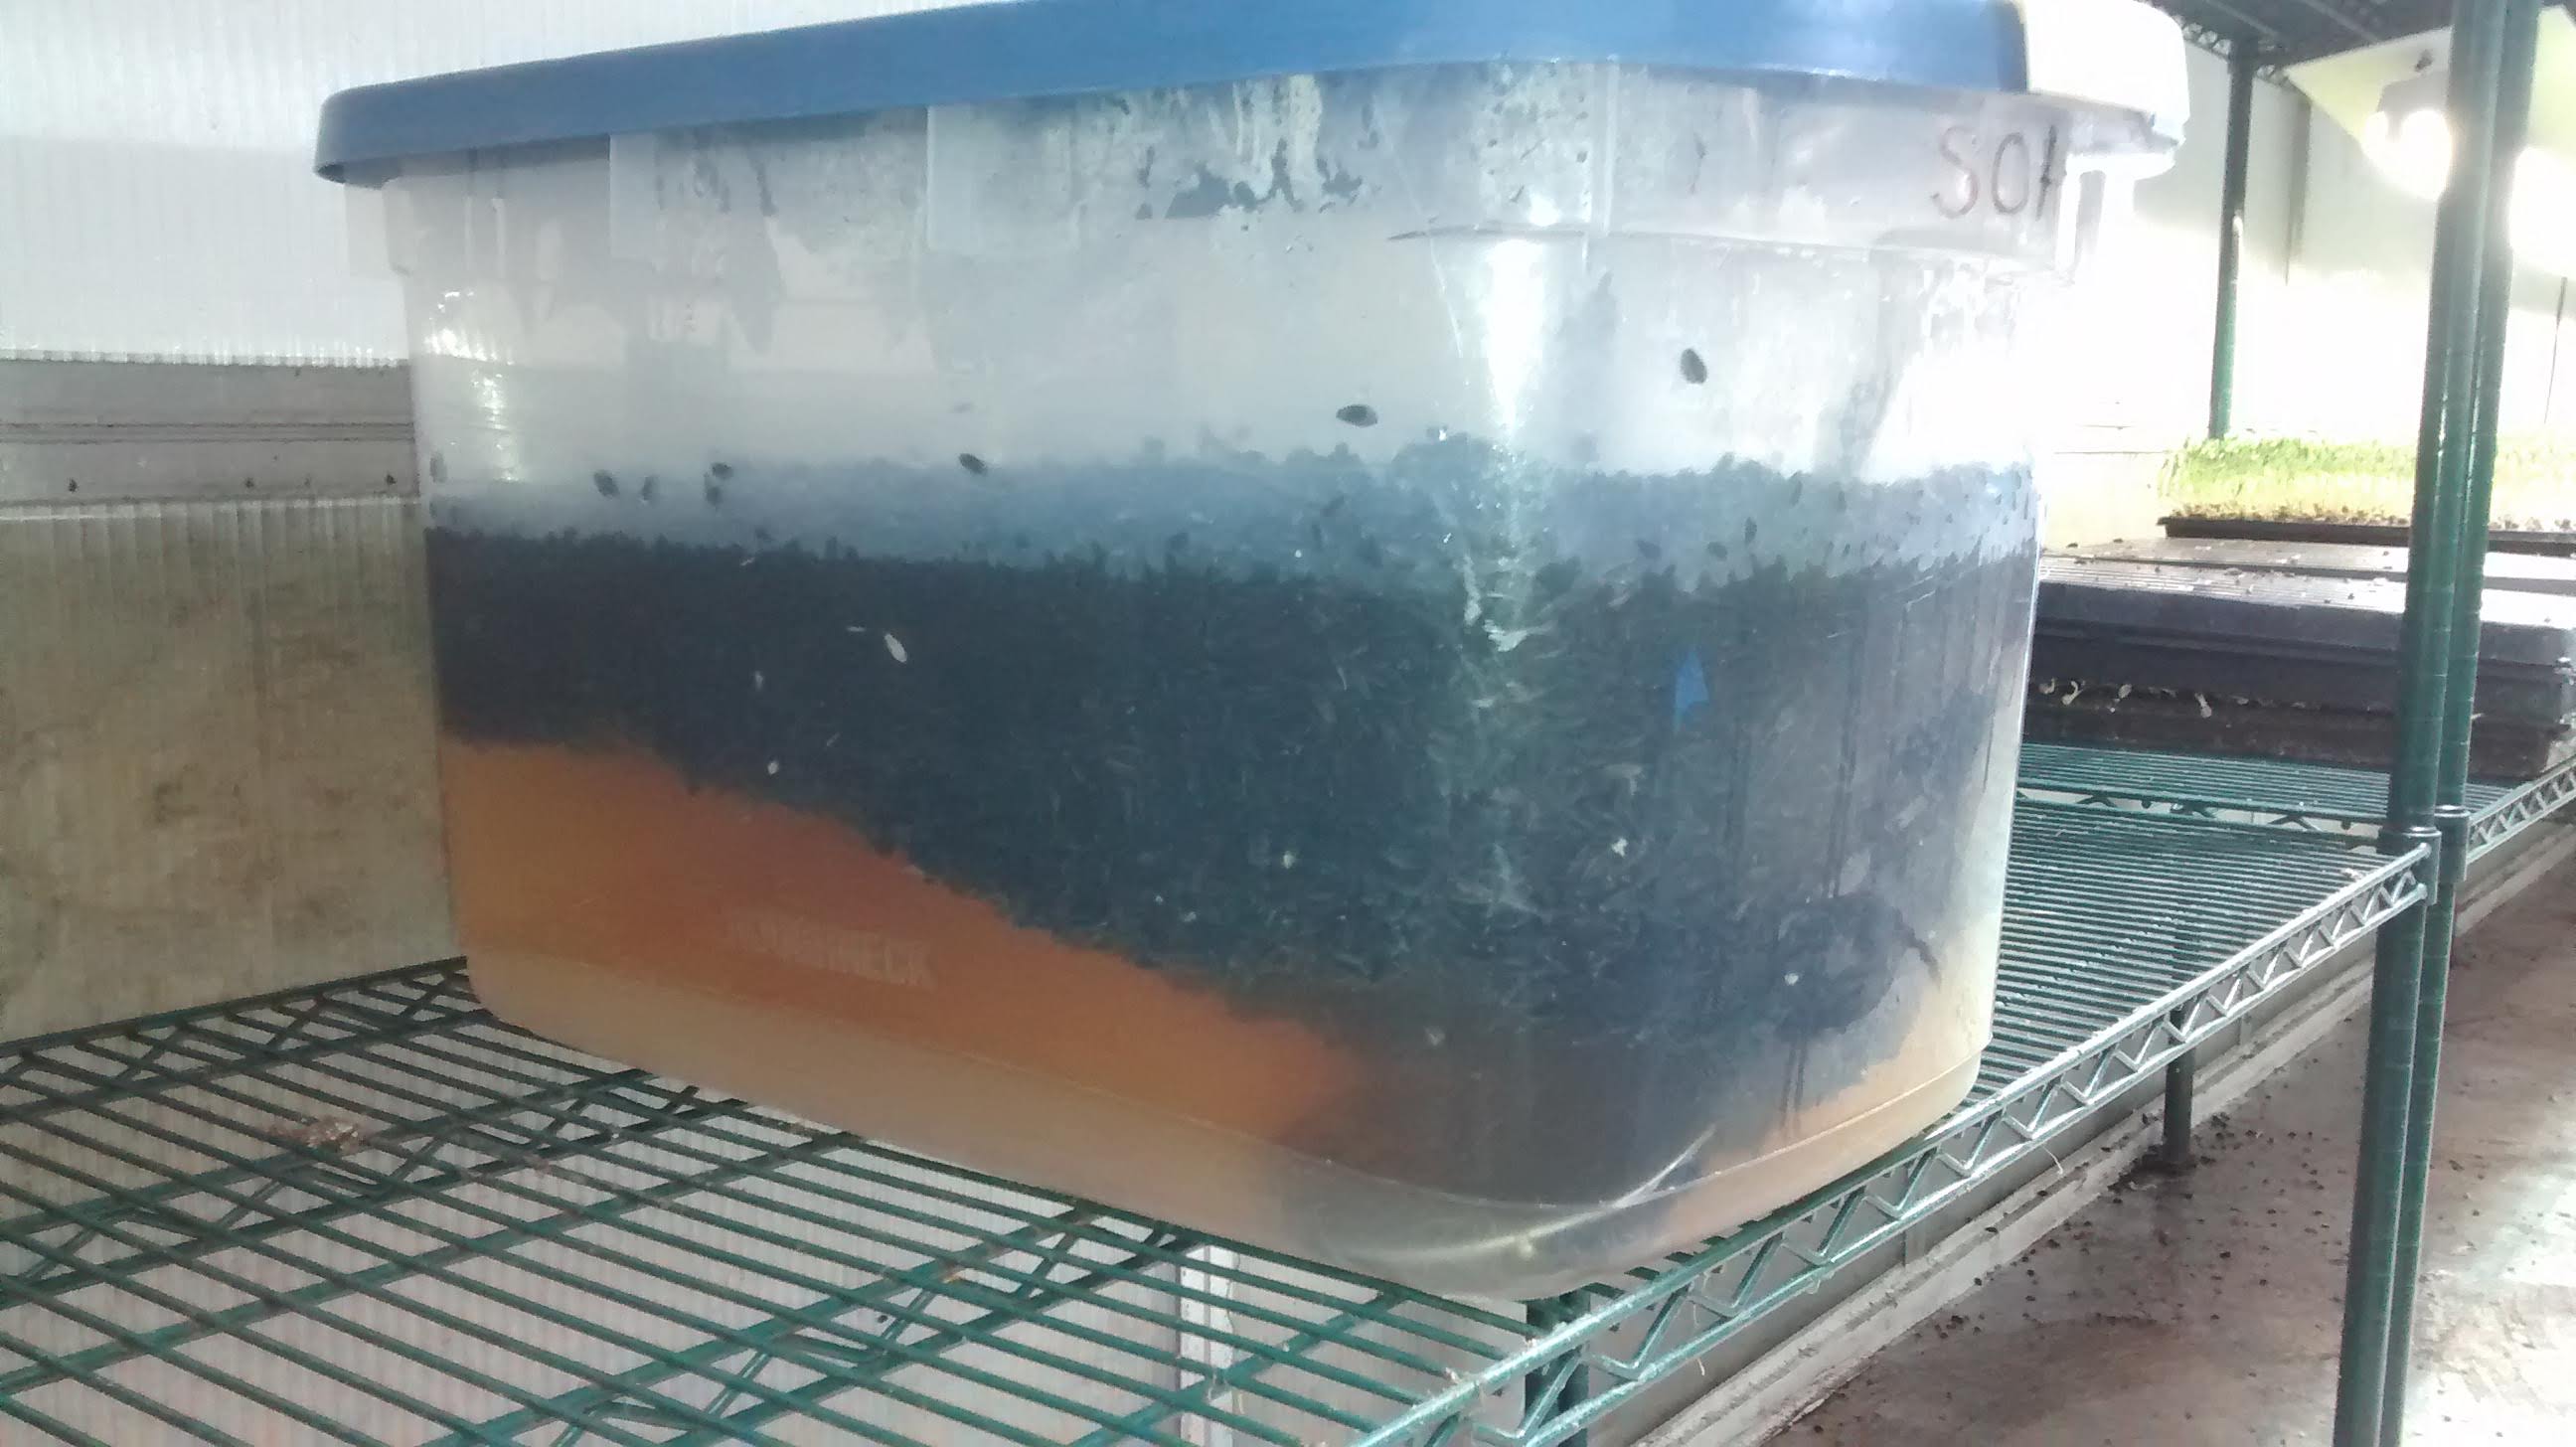
Soak (Seed)
Soak refers to soaking seed in water: the first step for growing a few microgreens crops. The soak stage helps induce germination in the seed. Soak time can last from 20 minutes to 12 hours.
Some seed soaking recommendations:
- Sunflower: 2 to 4 hours
- Pea: 12 hours (overnight)
- Wheatgrass: 20 to 60 minutes
Read more about soaking seed here (coming soon!)..
Sow (Seed)
Sow refers to sowing seed in top of soil or other growing medium. For crops with seed that does not get soaked, this marks the beginning of the crop cycle.
There are two basic manual ways of sowing seed:
- Dump and Spread: Used when you have soaked your seed
- Sprinkle: Used for sowing dry seed
Seed can also be sown using tools like the Kwik Klik Drop Seeder.
Read more about these methods here…(coming soon)

Cover (Seed)
Covering seed takes place after sowing and involves covering the seeded tray with another tray. This covering tray mimics the seed being under the soil.
Seed is typically covered in two ways:
- Weighted: The seeded tray is covered with a tray then a weight is placed on top
- Unweighted: The seeded tray is covered with another empty and no weight. This usually follows 1 to 3 days of weighted cover.
Read more about covering trays here (coming soon)…
Cover Tray
The empty tray used to cover a germinating crop.
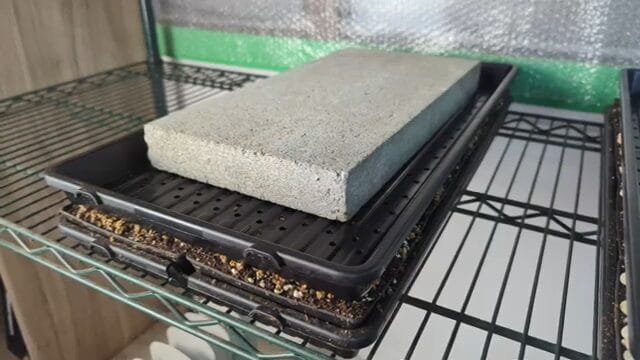
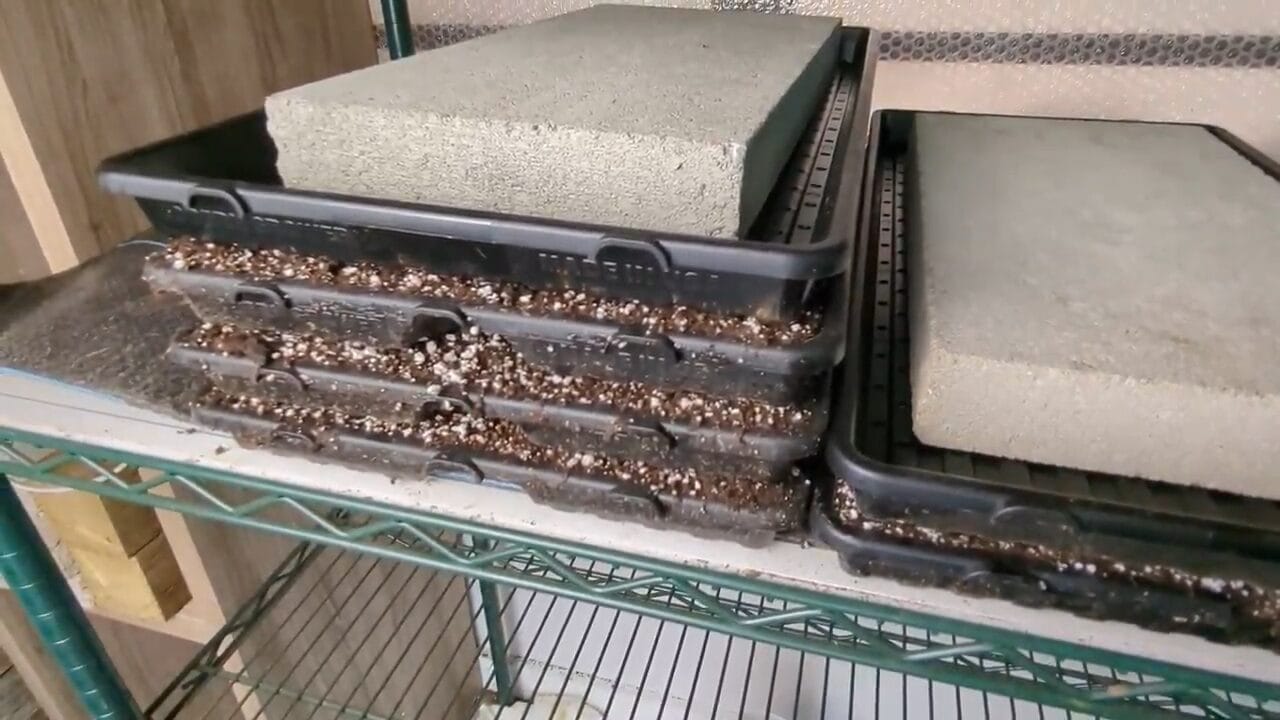
Weight
And heavy item placed on top of a cover tray to help ensure good contact between the cover tray and the sowed seed. A great option is an 8″ x 16″ paver which fits perfectly in a tray.
Stacking (Trays)
Stacking refers to the stacking of trays during the germination stage. The stacked trays act as both covering tray and weight, and help make good use of space for crop germination.
We recommend stacking trays no higher than three trays high, and then topping with an empty tray and a weight.
Read more about stacking trays here (coming soon)…
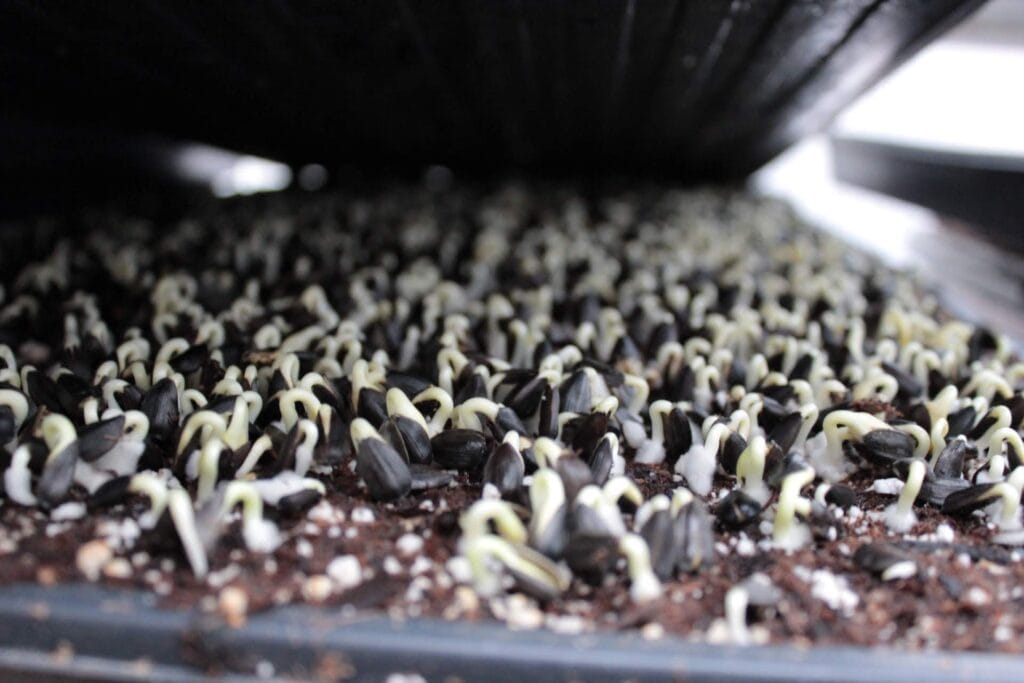
Germination
Germination refers to a seed’s emergence from it’s hull as it begins to grow. It can take from 3 to 7 days, with most crops germinating in 3 to 4 days. Typically, germination takes place completely in the dark – facilitated by the cover tray.
The success of the germination stage greatly determines the success of the final crop, so ideal conditions are crucial.
Crops can be removed from the germination stage when you can see they are pushing up the cover tray and trying to escape out the sides. A good rule of thumb is to uncover earlier than later to reduce the risk of crop disease due to limited air flow.
Read more about germination here (coming soon)…
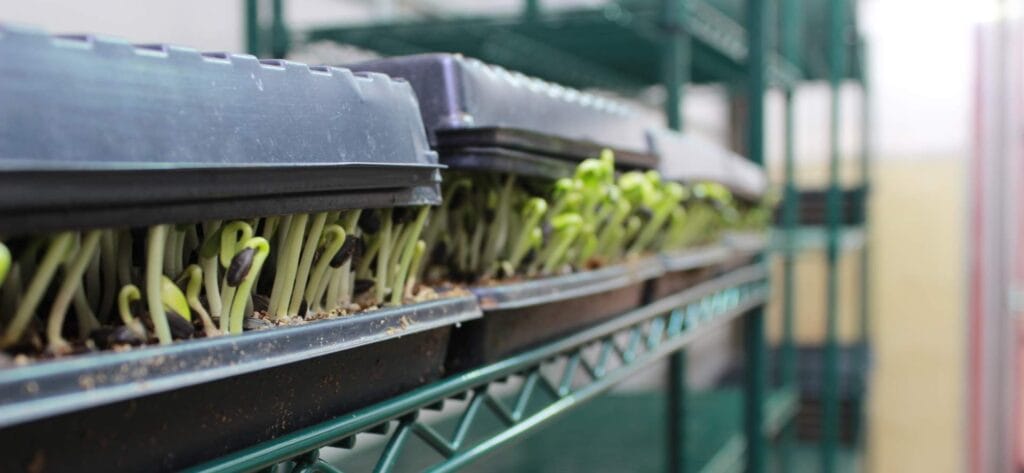
Uncover
The step of removing a cover tray from germinating seed to move it to its next stage of growth – either blackout or light.
Blackout
The blackout stage is an optional stage that follows the germination/cover stage and involves placing a tray upside down over a germinating crop.
The blackout stage is generally used to “stretch” a crop and make it taller, but can compromise overall crop quality. Very few crops actually benefit from this stage.
Read more about the blackout stage here (coming soon)
Crop Cycle
Crop cycle refers to the stages a crop goes through from start to finish. Here is a simple diagram outlining the basic elements of a crop cycle:
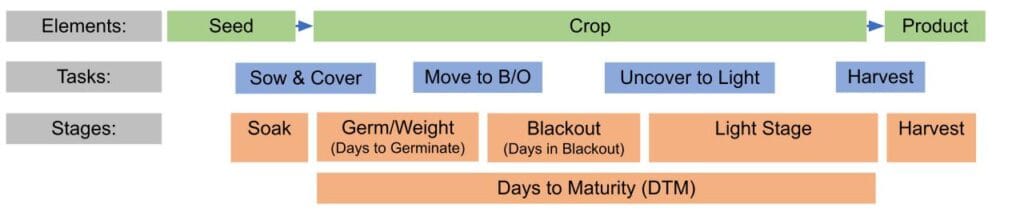
Read more about crop cycles here (coming soon)
Seed
A seed is the dormant plant embryo used to grow microgreens.
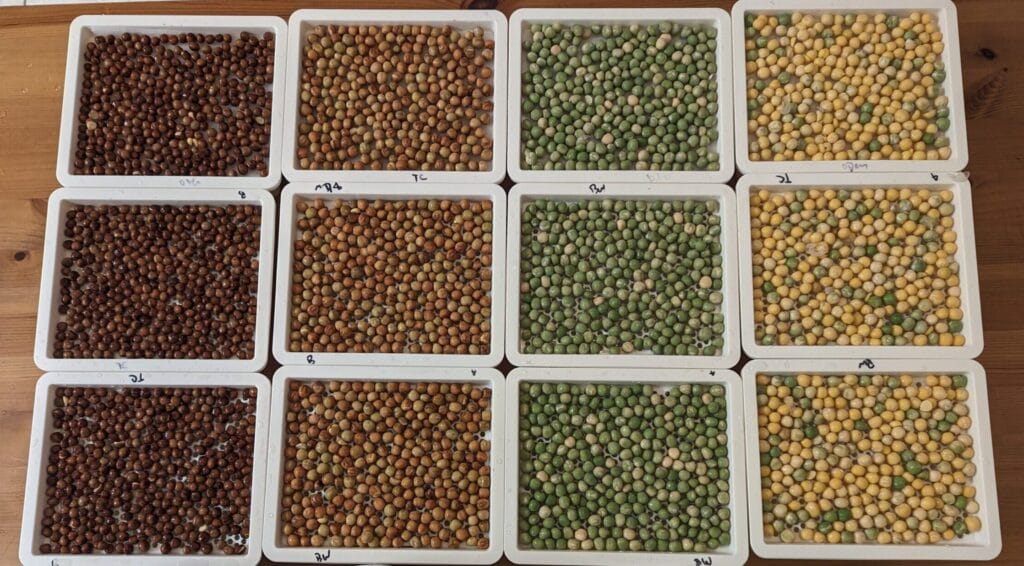
Seeds contain nutrients and genetic material needed for the plant’s early development. Microgreens are typically grown from untreated, whole seeds of vegetables, herbs, flower, and grains such as sunflower, radish, broccoli, cilantro, and pea. Seed selection, quality, and handling (e.g., soaking, sanitizing, storage) play a key role in crop success.
Read more about seeds here (coming soon)…
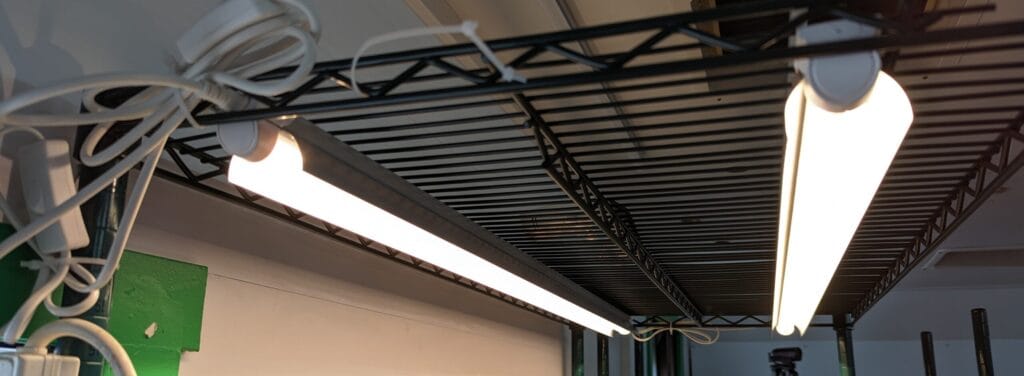
Light
In microgreens production, light is a critical environmental factor that drives photosynthesis, enabling plants to develop color, flavor, and nutrient content after germination.
Most microgreens require artificial grow lights or natural sunlight once the germination period ends. The intensity, duration (photoperiod), and quality (spectrum) of light all influence growth quality.
Common setups include LED grow lights with a full or white spectrum, typically run for 12 to 18 hours per day.
Read more about light here (coming soon)…
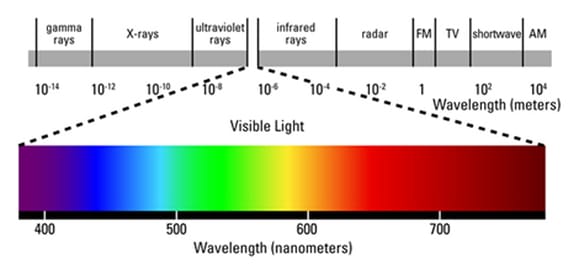
Light Quality (Spectrum)
Light quality, also called the light spectrum, refers to the wavelengths of light that plants receive — measured in nanometers (nm).
Different wavelengths affect plant growth in different ways. For microgreens, red (around 660 nm) and blue (around 450 nm) light are the most influential:
- Blue light supports compact growth and strong stems.
- Red light encourages elongation and leaf expansion.
A full-spectrum LED grow light mimics natural sunlight and provides a balanced mix of wavelengths, making it ideal for microgreens production. Light quality influences not just growth rate but also color, flavor, and nutrient density.
Read more about light here (coming soon)…
Light Intensity – PPFD
Light intensity refers to the amount of photosynthetically active radiation (PAR) – measured in micromoles per square meter per second, or µmol/m²/s) – that reaches the surface of your microgreens crop. It directly affects photosynthesis rate, influencing how quickly microgreens grow, how green they become, and how much biomass they produce. Light intensity is typically referred to as Photosynthetic Photon Flux Density (PPFD).
In microgreens production:
- Typical light intensity ranges from 100 to 300 µmol/m²/s.
- Too little light leads to pale, leggy growth.
- Too much light can cause stress, yellowing, or dryness.
Optimizing intensity depends on the crop type, light duration, and distance from the canopy.
Read more about light intensity here (coming soon)…
Photoperiod (Light Duration)
Photoperiod refers to the number of hours each day your crop received light (hrs/day)
Daily Light Integral (DLI)
Daily Light Integral (DLI) combines PPFD and Photoperiod to give a measure of how much light a crop receives each day. The equation is:
PPFD (µmol/m2s) x Photoperiod (hrs/day) x .0036 = DLI (mol/m2d)
The addition of “.0036” converts the seconds into hours (multiply by 3600 s/hr) and the µmol into mol (dividing by 1,000,000 µmol/mol).
Read more about DLI here (coming soon)
Days to Maturity (DTM)
This is the number of days between when a crop is soaked or sowed and when it is harvested. This is an important measure because based on your harvest date it determines your crop soak or sow date.
Days to Germinate (DTG)
This is the number of days it takes a crop to germinate once soaked or sowed and lasts from soak or sow to uncovering (either to light or to the blackout stage). It is an important number for scheduling crop production tasks.
Seeding Rate
The amount of seed to sow for a given area to achieve the crop quality you desire. Often it is given in g/1020 tray. Knowing your exact seeding rate makes sowing more efficient and helps you accurately calculate seed costs.
Check out our table of recommended sowing rates here (coming soon).
Expected Yield
This is the weight of crop you expect to harvest from each crop. Knowing your expected yield is important for calculating how many trays to sow to fulfill your orders at each harvest. It is called expected yield because yield will always be a variable from harvest to harvest.
Harvest
This is the process of cutting your greens to prepare them for packaging. It is a best practice to have fixed harvest days each week.
Live Tray
A tray that is grown as a Crop and then sold live as a Product.
This is a popular way to sell wheatgrass.

Crop Planning
Crop planning is the process of organizing your microgreens production based on current or anticipated customer orders. It involves calculating what to grow, how much to grow, and when to grow it in order to meet product needs with accuracy and efficiency.
At its core, crop planning is about working backwards from harvest dates to determine key steps such as:
- Crop cycle timing (germination, blackout, photosynthesis, harvest)
- Soaking and sowing dates
- Tray count based on yield and product size
Read more about crop planning here (coming soon).
Grow to Order
Grow to order is a crop planning strategy where microgreens are grown specifically to meet pre-determined customer demand, rather than growing in anticipation of possible sales. This means each crop is linked to a confirmed or forecasted order, and production is scheduled around set harvest dates.
Key features:
- You only grow what’s needed — reducing waste and overproduction.
- You work backward from harvest dates to determine soak, sow, and uncover times.
- It supports more accurate planning of seeds, trays, space, and labor.
This approach is essential for maintaining product freshness, managing resources efficiently, and improving profitability — especially in direct-to-customer models like restaurants, farmers markets, or subscription services.
Temperature
Temperature refers to the ambient heat level in the growing environment, which directly affects germination speed, growth rate, and crop quality in microgreens production.
Ideal temperature ranges vary by stage:
- Germination stage: 20–24°C (68–75°F) — warm temperatures speed up sprouting.
- Growth phase (post-blackout): 16–22°C (60–72°F) — cooler temps help prevent leggy growth and reduce disease risk.
Temperature also influences:
- Water evaporation and mold risk
- Crop timing (affecting harvest schedules)
- Energy use in climate-controlled setups
Maintaining consistent, optimal temperatures is key for predictable crop cycles and high-quality yields.
Relative Humidity
Relative humidity (RH) is the percentage of moisture in the air relative to the maximum amount the air can hold at a given temperature. In microgreens production, RH affects evaporation, disease risk, and overall plant health.
Ideal RH levels for microgreens:
- Germination stage: 90–100% RH — supports seed hydration and uniform sprouting.
- Growth phase: 40–70% RH — prevents excessive moisture that can lead to mold or damping-off disease.
Too high RH can cause:
- Mold growth
- Weak stems
- Poor air circulation problems
Too low RH can lead to:
- Drying out of the growing medium
- Wilting and poor growth
Controlling RH through ventilation, airflow, and environmental monitoring is essential for a healthy growing environment.
Vapor Pressure Deficit
Vapor Pressure Deficit (VPD) is a measure of the difference between the amount of moisture the air can hold when fully saturated (100% RH) and the actual amount of moisture in the air. It reflects the “drying power” of the air, influencing how quickly water moves from the plant (via transpiration) into the atmosphere.
In microgreens production, VPD helps you balance humidity and temperature to:
- Prevent diseases like mold (caused by excess humidity and low VPD)
- Avoid stress and wilting (caused by too high VPD)
- Optimize transpiration and nutrient uptake
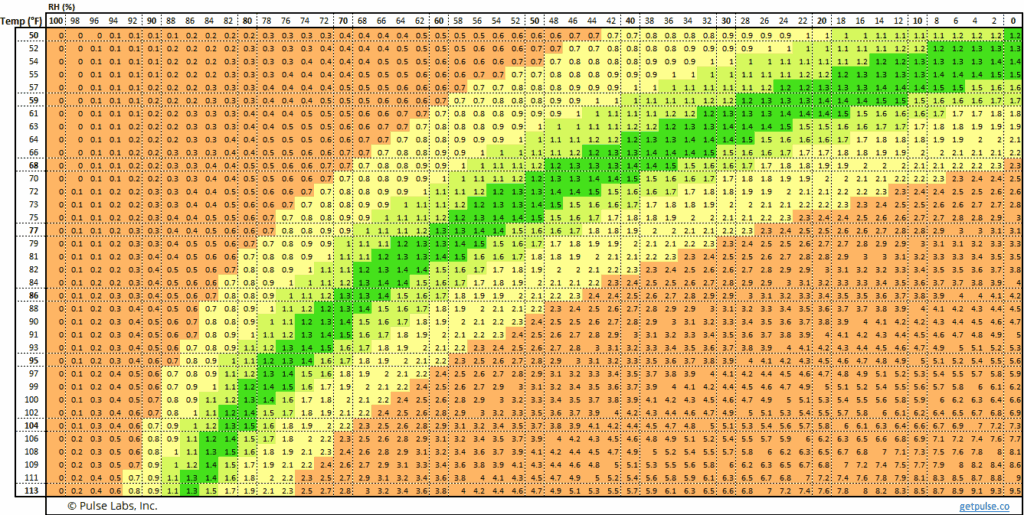
Ideal VPD Range for Microgreens:
- 0.4 – 1.0 kPa (kilopascals)
- Lower end for germination and delicate crops
- Higher end for mature microgreens and airflow-heavy setups
VPD=SVP×(1−100/RH)
Where:
- RH = Relative Humidity (%)
- SVP = Saturation Vapor Pressure at air temperature (kPa)
And where SVP = 610.78 x e^(T / (T +237.3) x 17.2694)
- T is in degrees Celsius
- The result, SVP, is in pascals (divide by 1000 to get kPa)
- e is a mathematical constant called Euler’s Number, approximately equal to 2.71828.
Production Workflow
In microgreens production, workflow refers to the physical layout and movement of people, materials, and tasks within the production space — organized to ensure efficiency, safety, and biosecurity.
A well-designed workflow:
- Minimizes backtracking and unnecessary movement
- Separates “clean” and “dirty” zones to avoid cross-contamination
- Aligns tasks in a logical, linear flow (e.g., from seed prep → sowing → growing → harvesting → packing → delivery)
- Supports good sanitation practices, especially in food-safe environments
Key Workflow Zones Often Include:
- Seed storage and prep
- Tray washing and staging
- Sowing and blackout
- Grow rack area
- Harvesting and processing
- Packing and storage
- Waste and compost handling
Good workflow design reduces labor, improves output, and is foundational for scaling up a microgreens operation while maintaining quality and heaelth authority compliance.
Standard Operating Procedure
A Standard Operating Procedure (SOP) is a detailed, step-by-step instructional document that outlines exactly how to perform a specific task or process in microgreens production. SOPs are designed to ensure consistency, efficiency, safety, and quality — especially when training staff, scaling production, or maintaining food safety standards.
SOPs in a microgreens context might include:
- Seed soaking SOP (e.g., how long and in what volume of water)
- Sowing SOP (e.g., tray prep, seeding rate, surface leveling)
- Harvesting SOP (e.g., tools used, sanitation, labeling)
- Cleaning SOP (e.g., disinfecting trays between cycles)
Each SOP typically includes:
- Responsible roles (if applicable)
- Purpose of the task
- Tools and materials needed
- Detailed instructions
- Timing and conditions
Leave a Reply